Each member can set their own default site without affecting others.
Guides
Nomad
Nomad is a sales channel on the Centrapay business portal that allows merchants to accept payments without any hardware. By logging into the business portal on any phone, tablet, or desktop, merchants can generate a QR code for customers to scan and pay instantly.
Key features and benefits
- No terminal or hardware required. A virtual POS built into the business portal.
- Runs on any phone, tablet, or desktop. All you need is a browser.
- Fast and simple to use. Start accepting payments immediately.
Who is Nomad for
Nomad is designed for in-store merchants who want a flexible, low-friction payment option without the cost or commitment of purchasing a physical terminal. It is ideal for pop-up stores, market stalls, small retail shops, sole traders, or any merchant who needs to accept payments on the go without relying on traditional EFTPOS devices.
Fees
Nomad is available for in-store merchant sites. Usage fees are subject to the in-store pricing of your active Acceptance Programme.
How to enable Nomad
Add Nomad as a Sales Channel
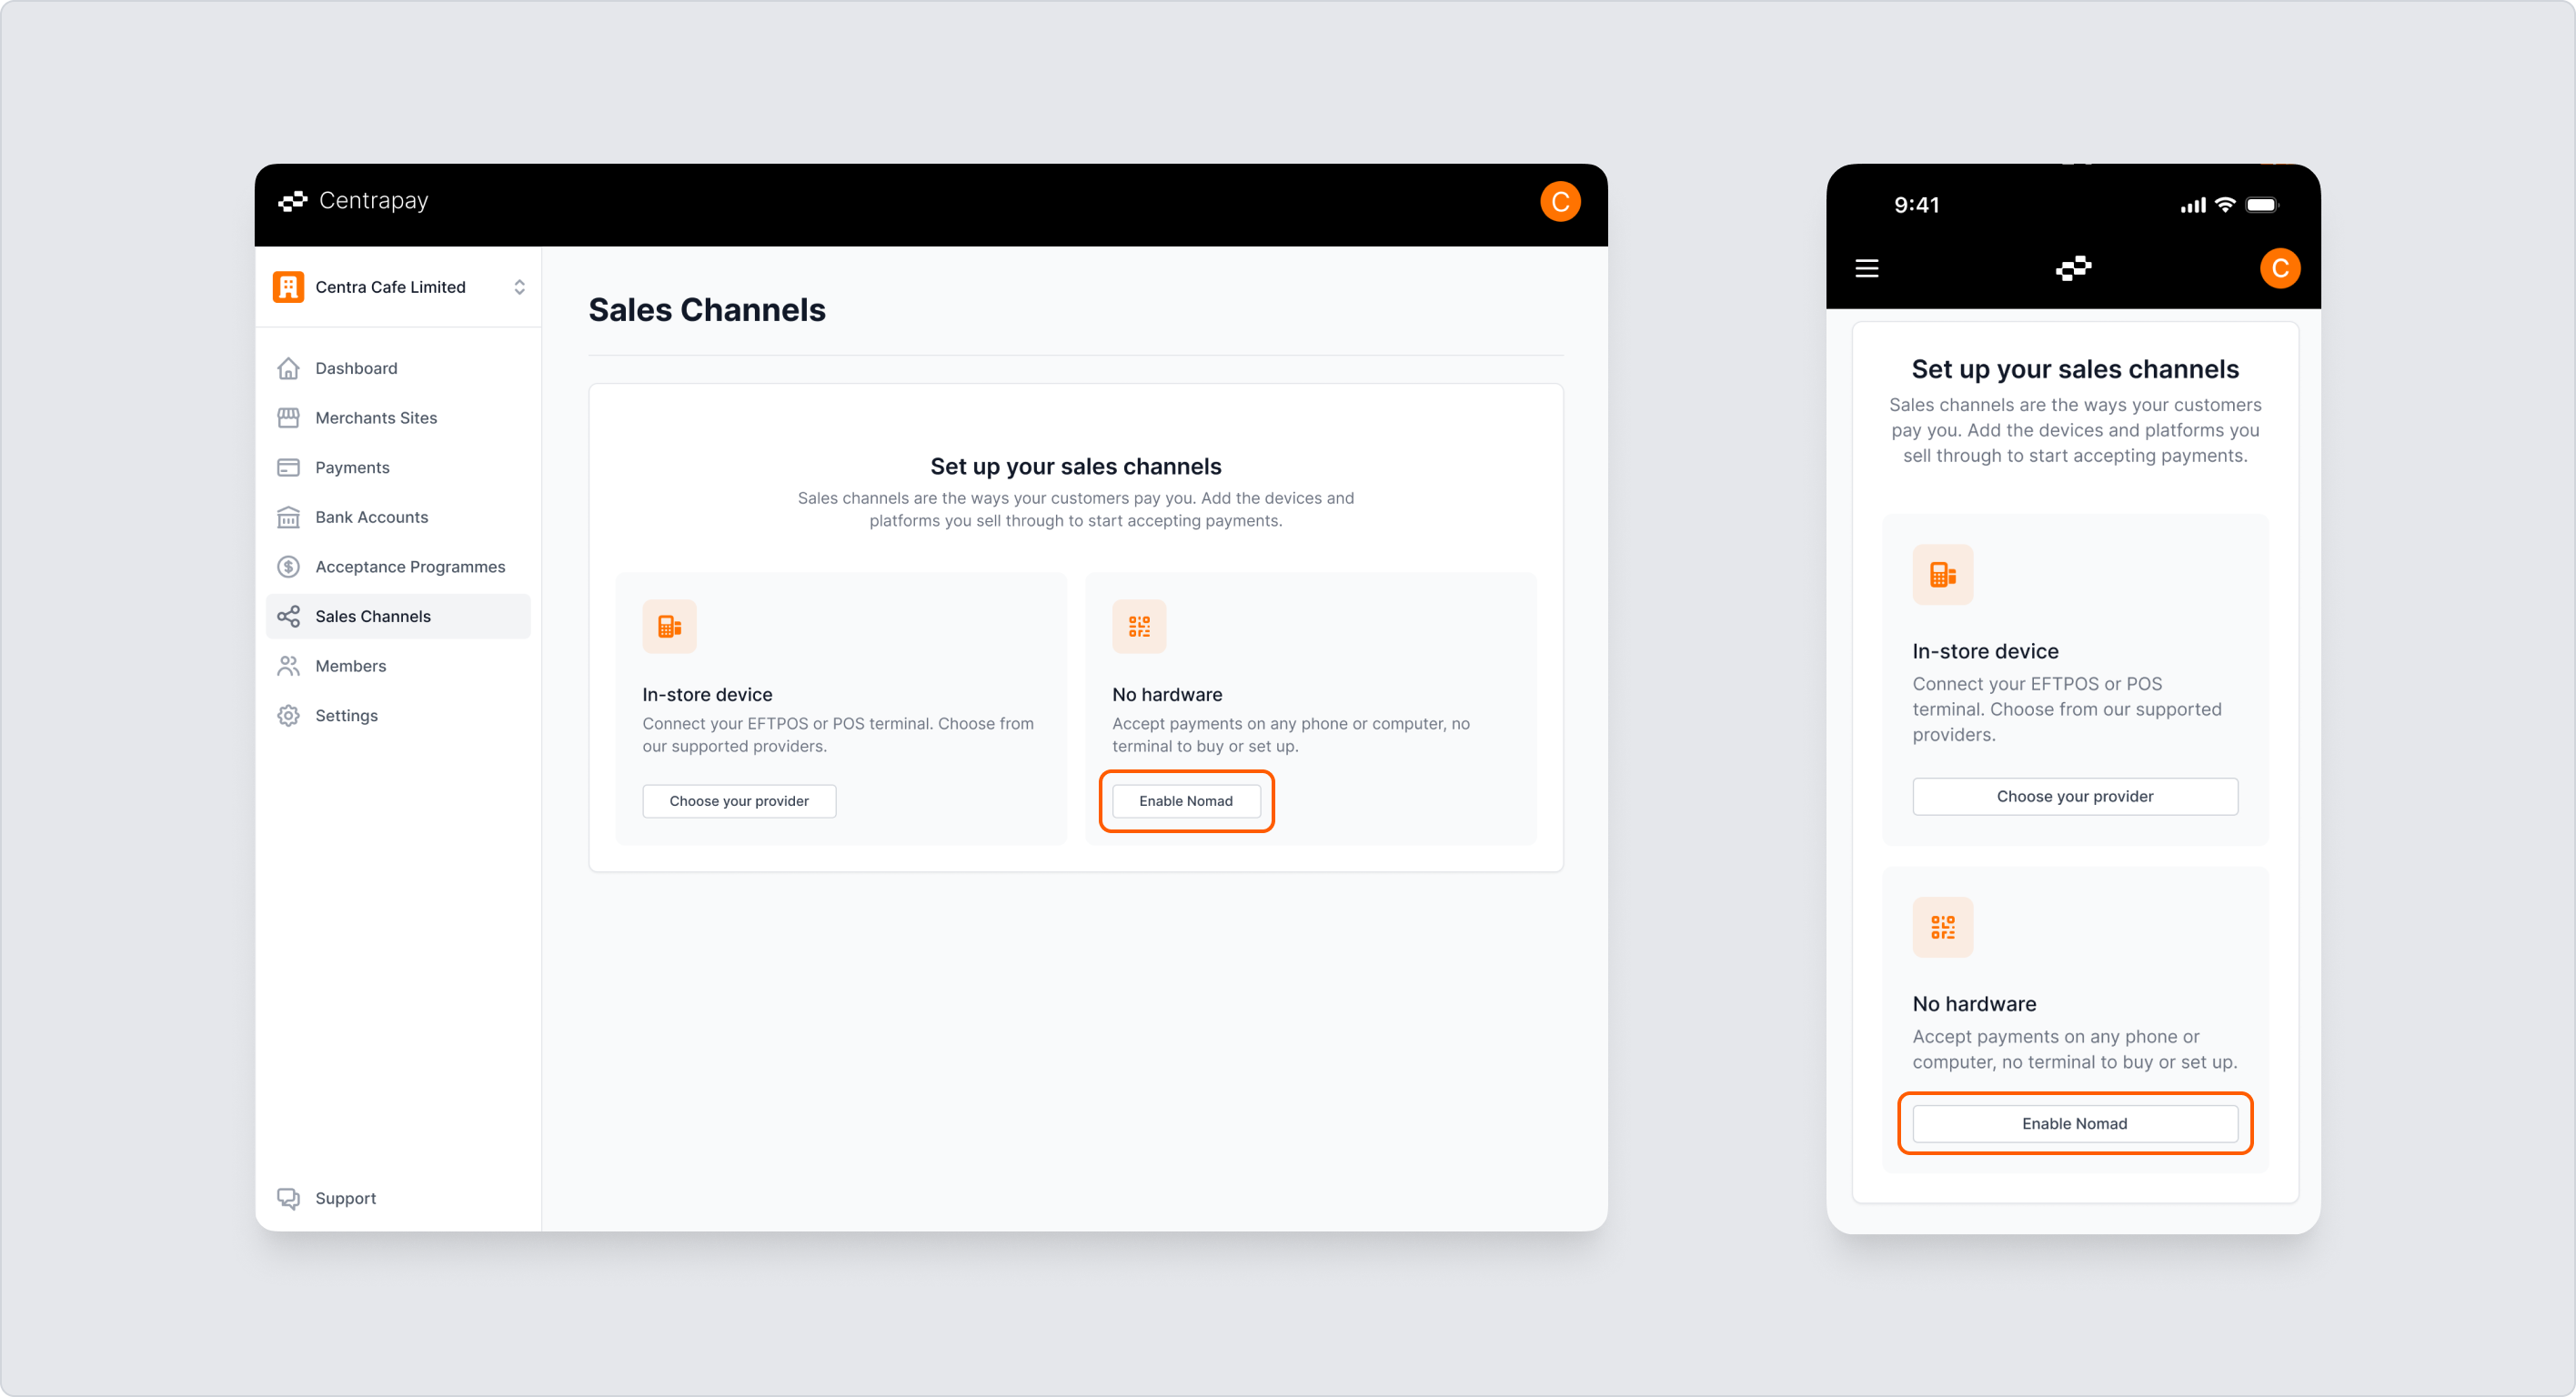
If you have no existing sales channels, navigate to Sales Channels in the Business Portal. You will be prompted to set up your first sales channel. Select No hardware to begin the Nomad setup process.
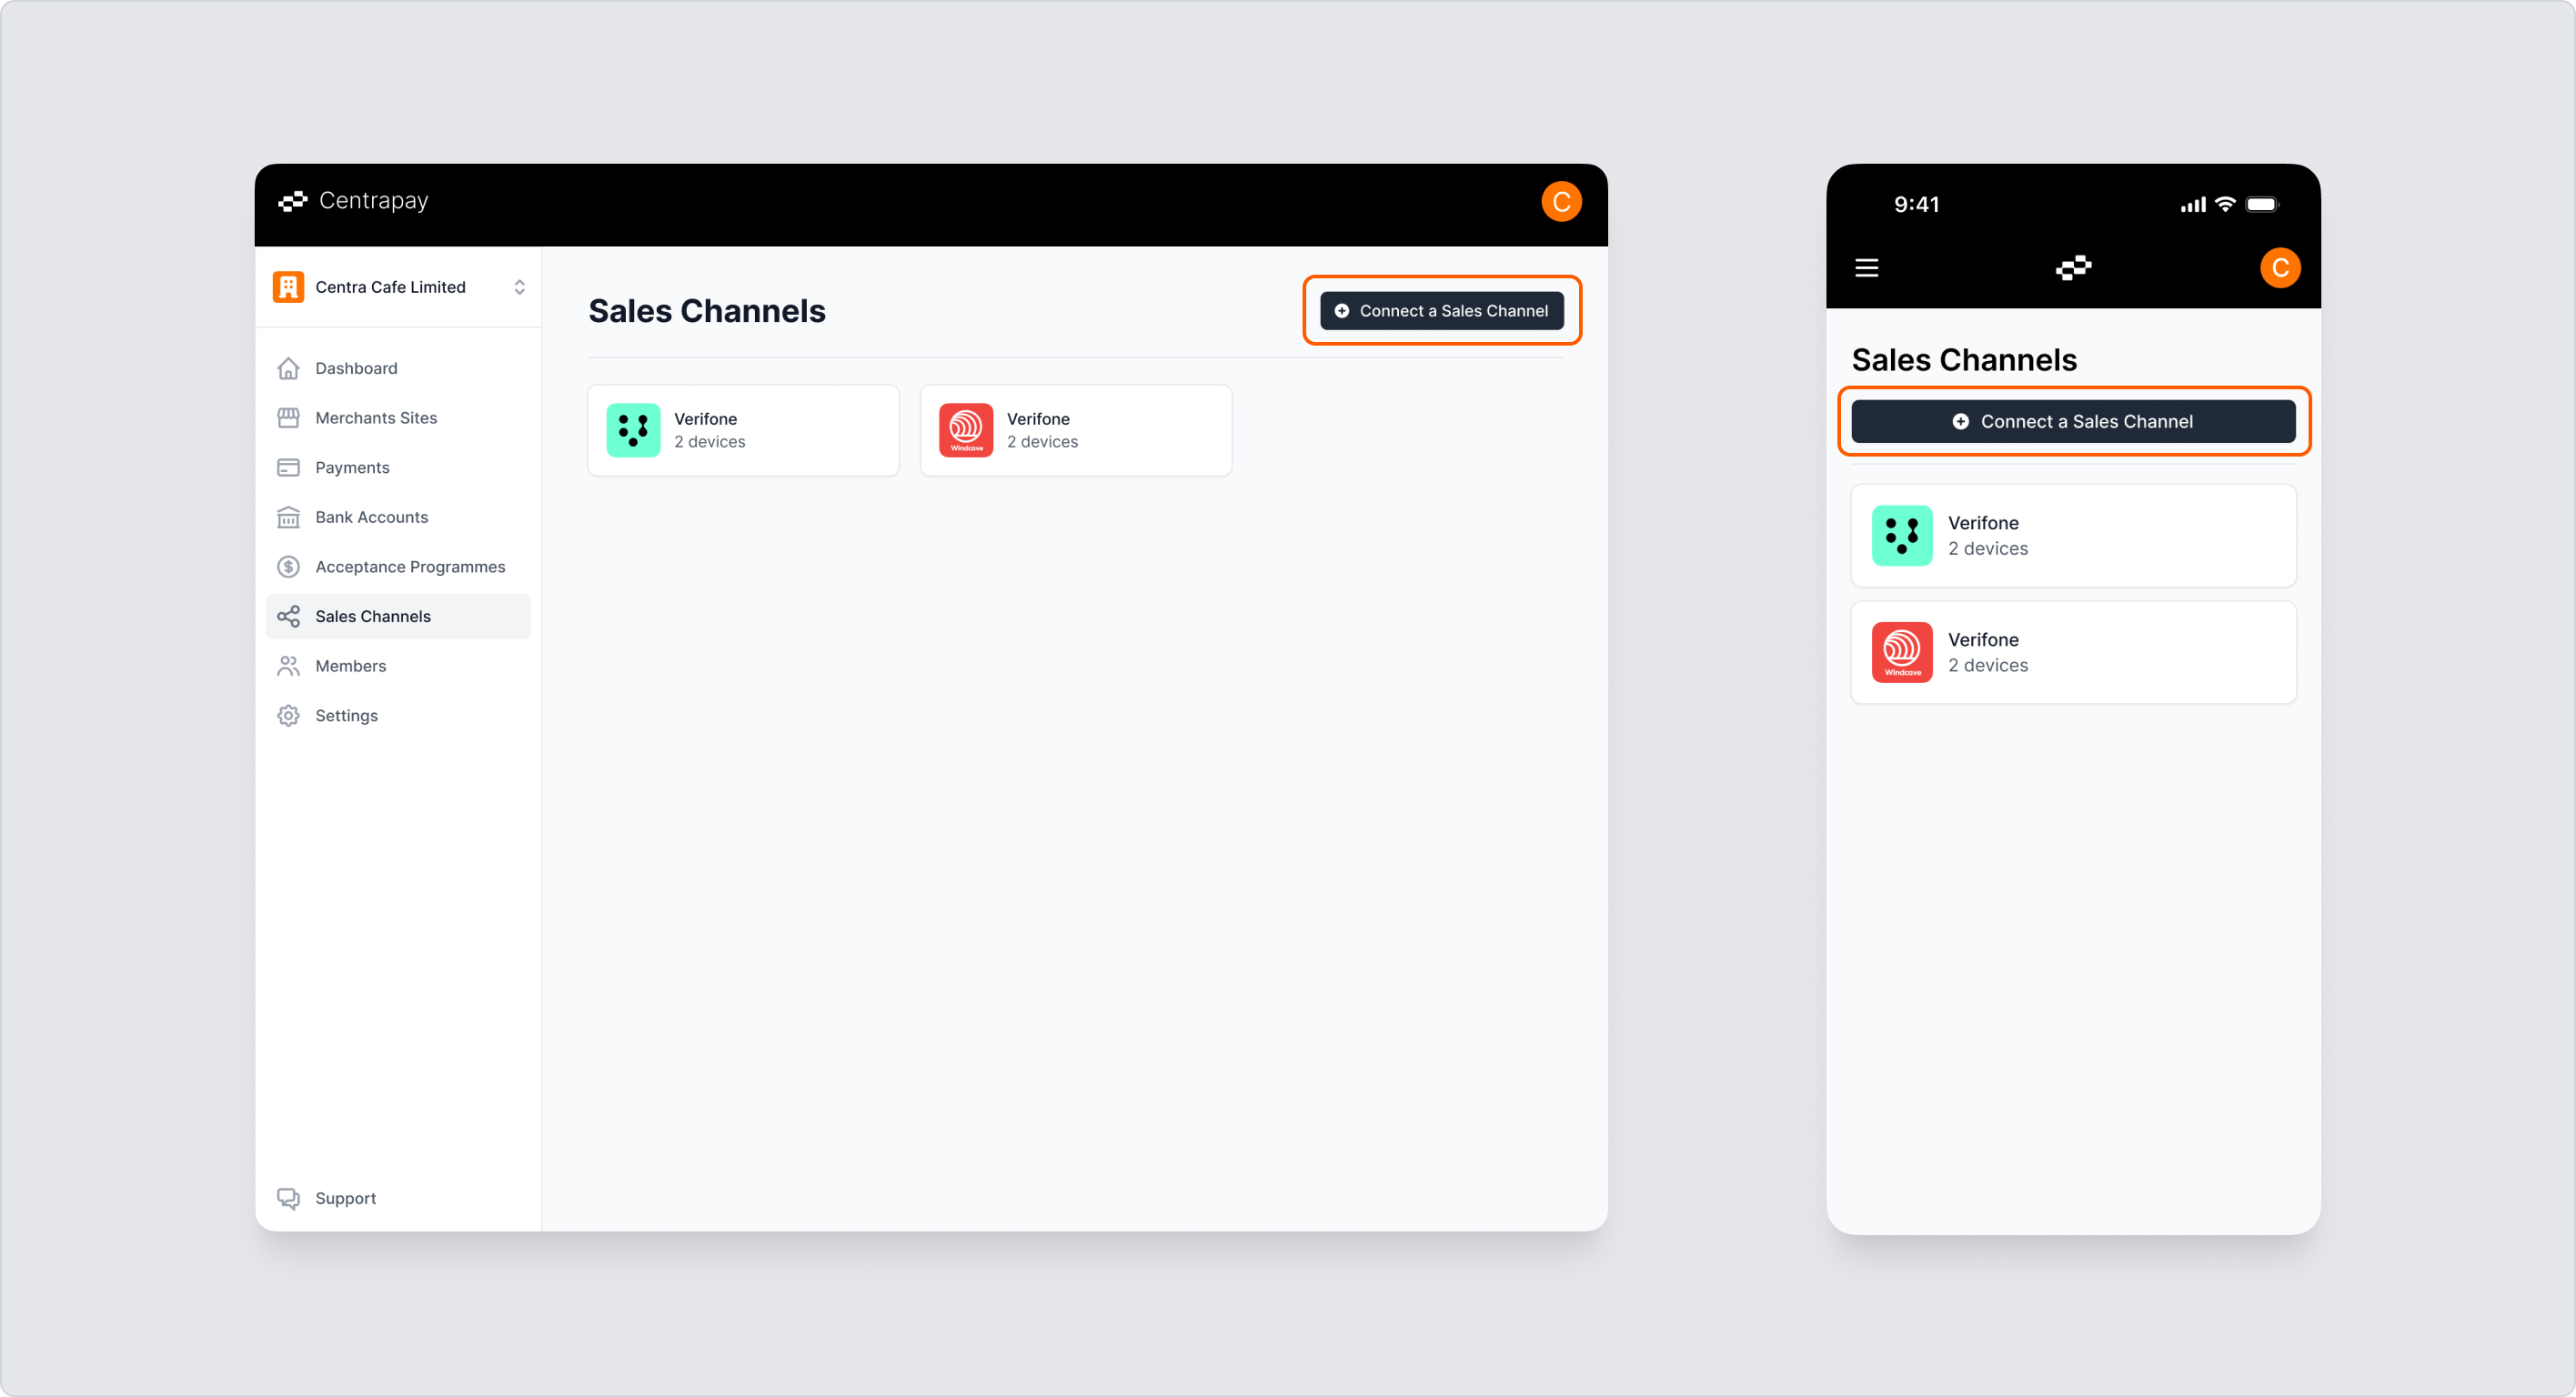
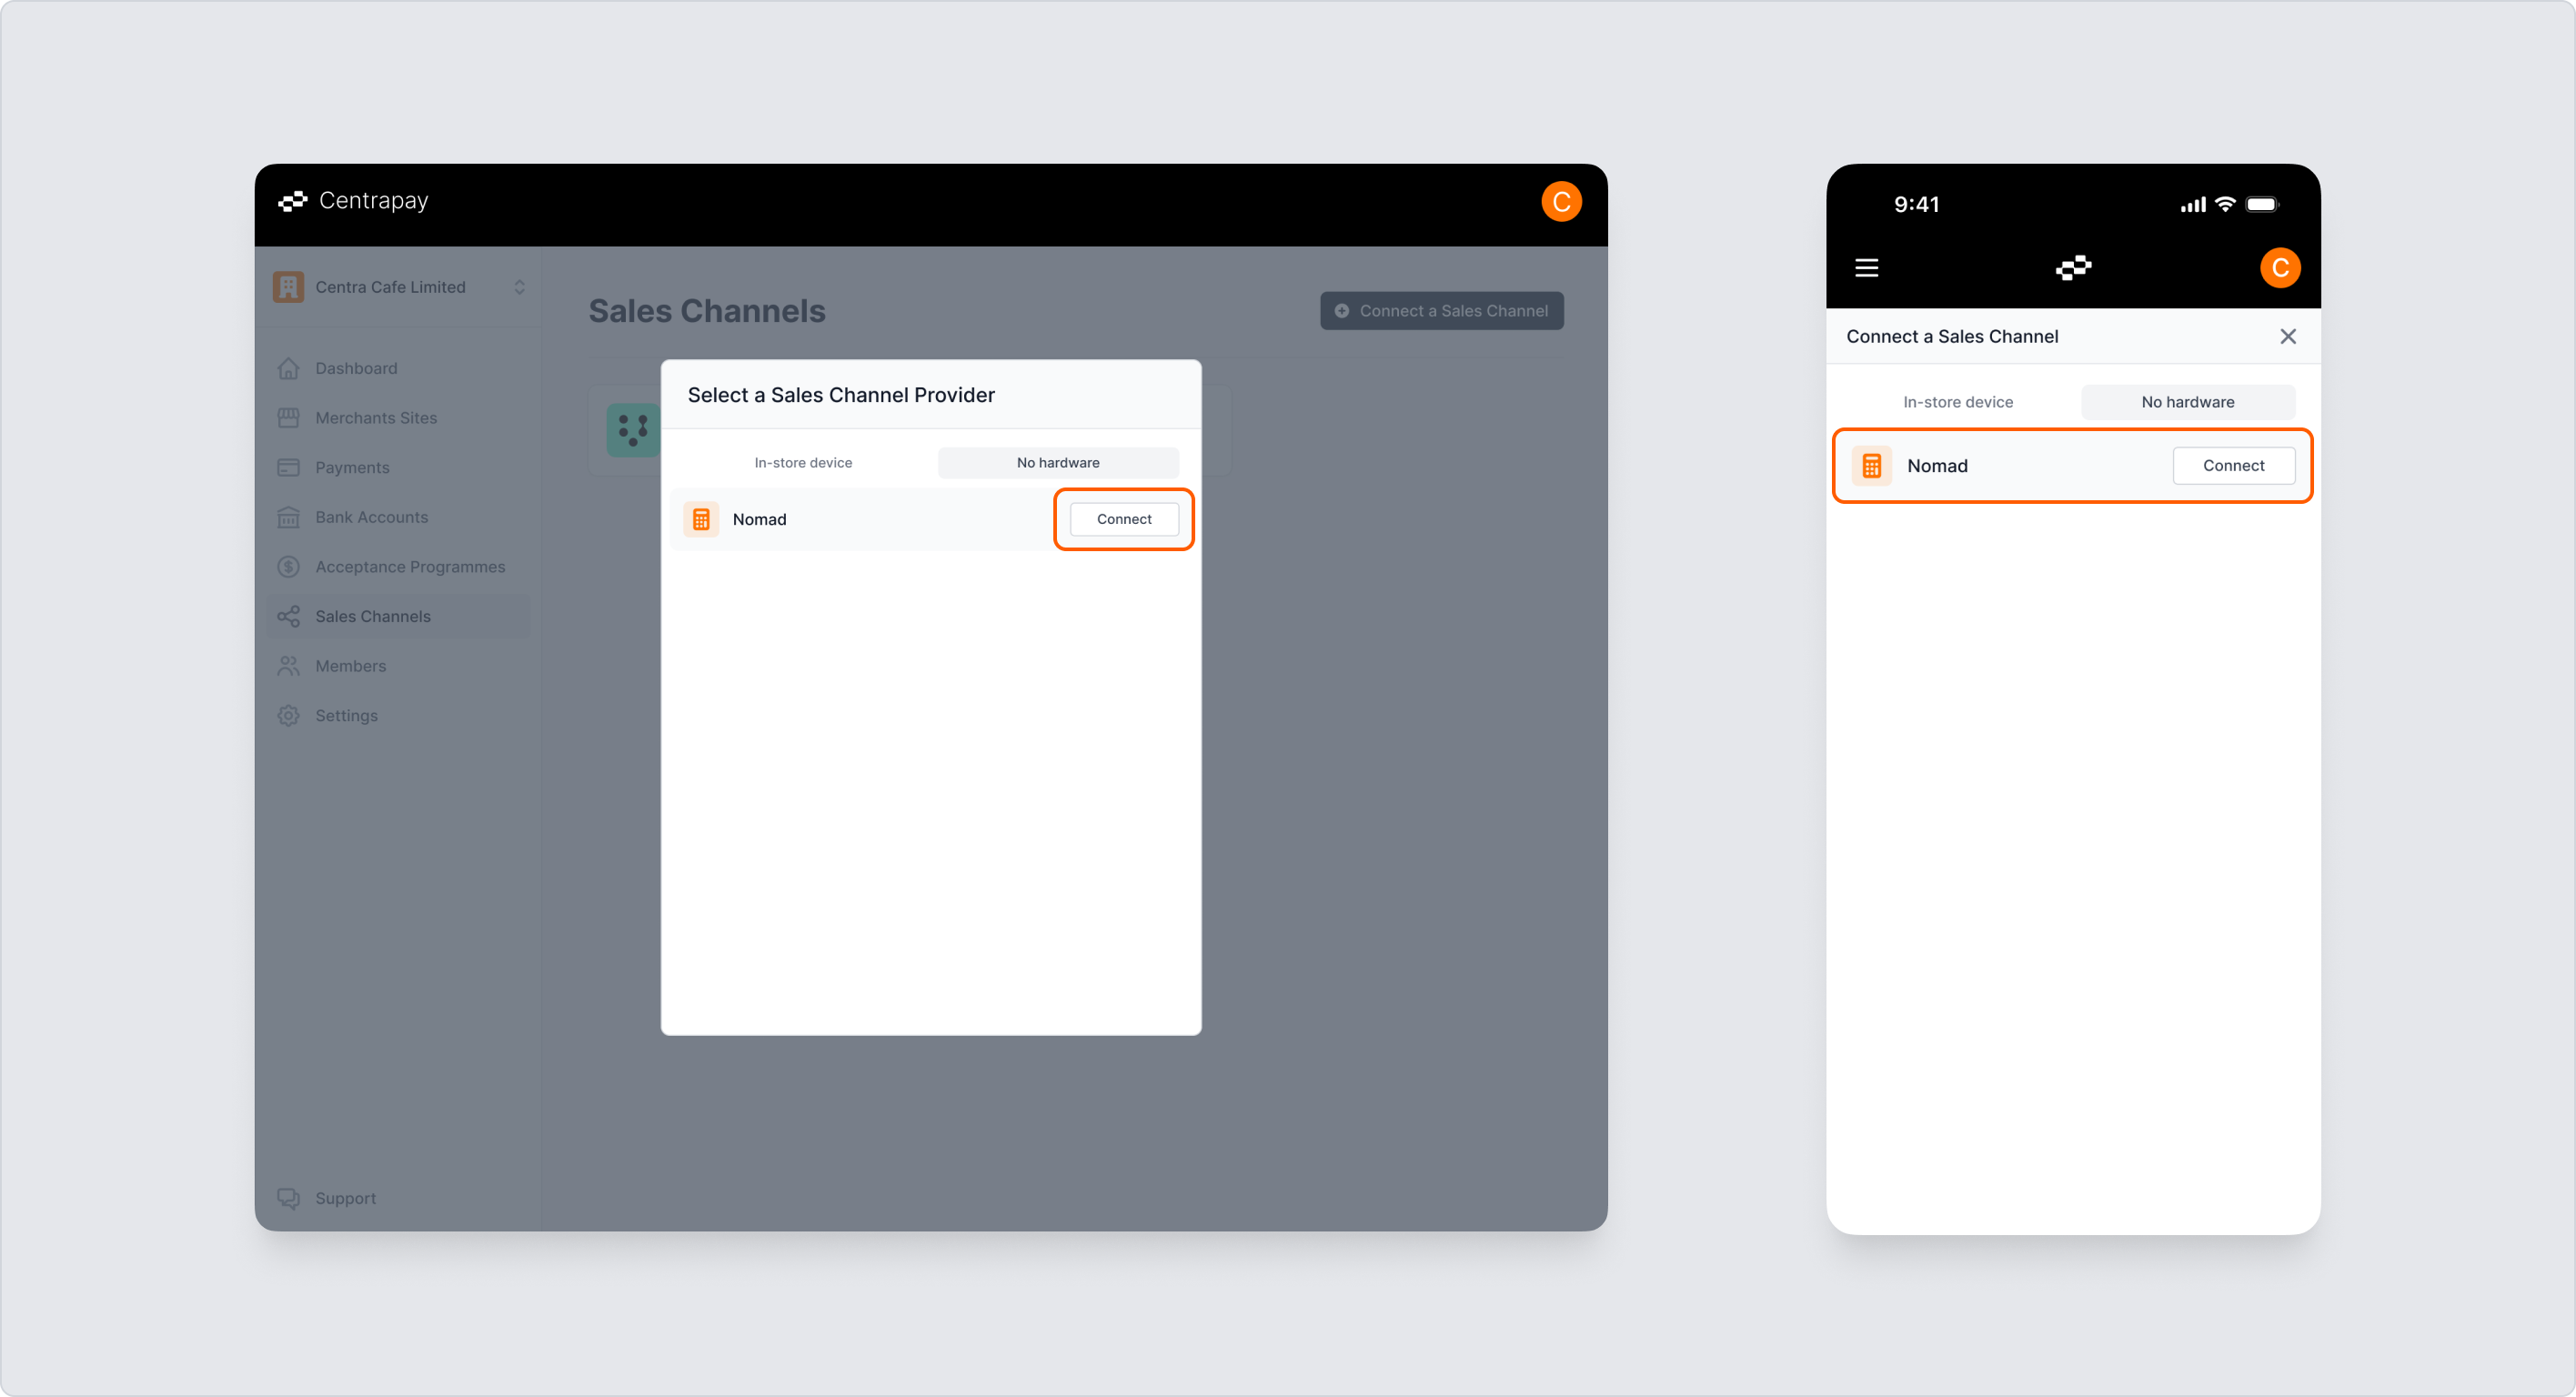
If you already have existing sales channels, click Connect a Sales Channel and select Nomad from the No hardware category.
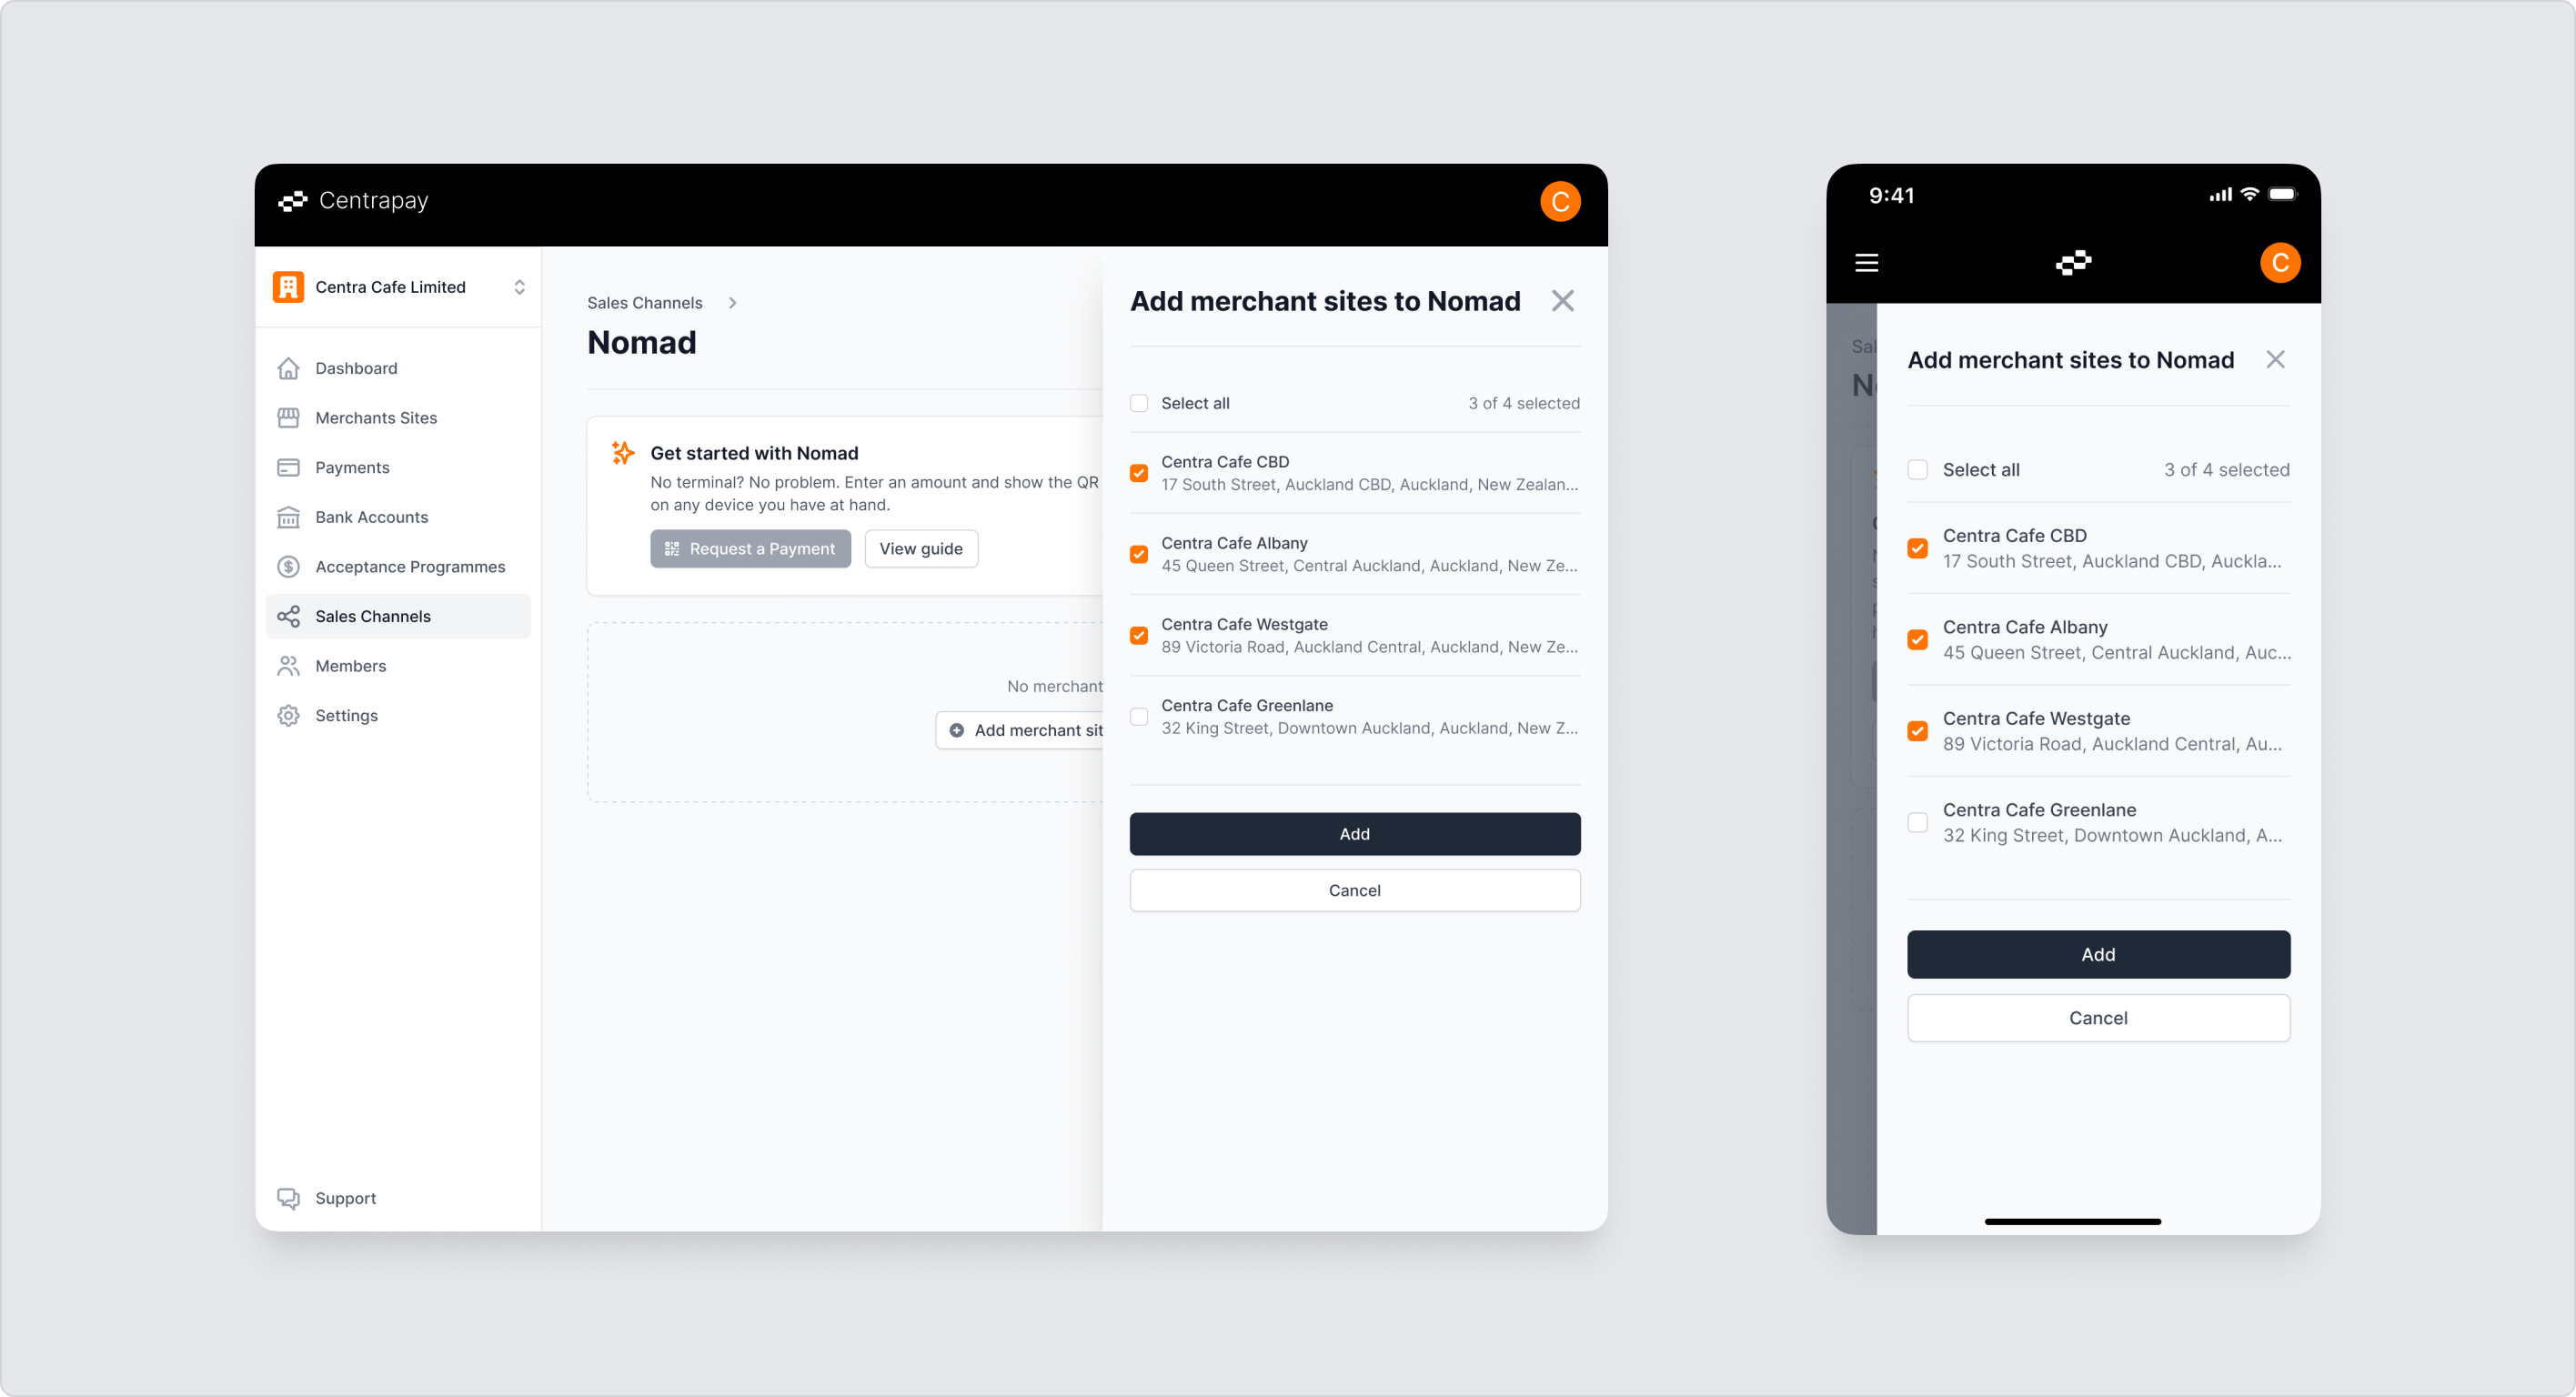
Select merchant sites
Once you choose to enable Nomad, you will be prompted to select which merchant sites you want to enable it for. Only in-store merchant sites are eligible. Select one or more merchant sites and confirm.
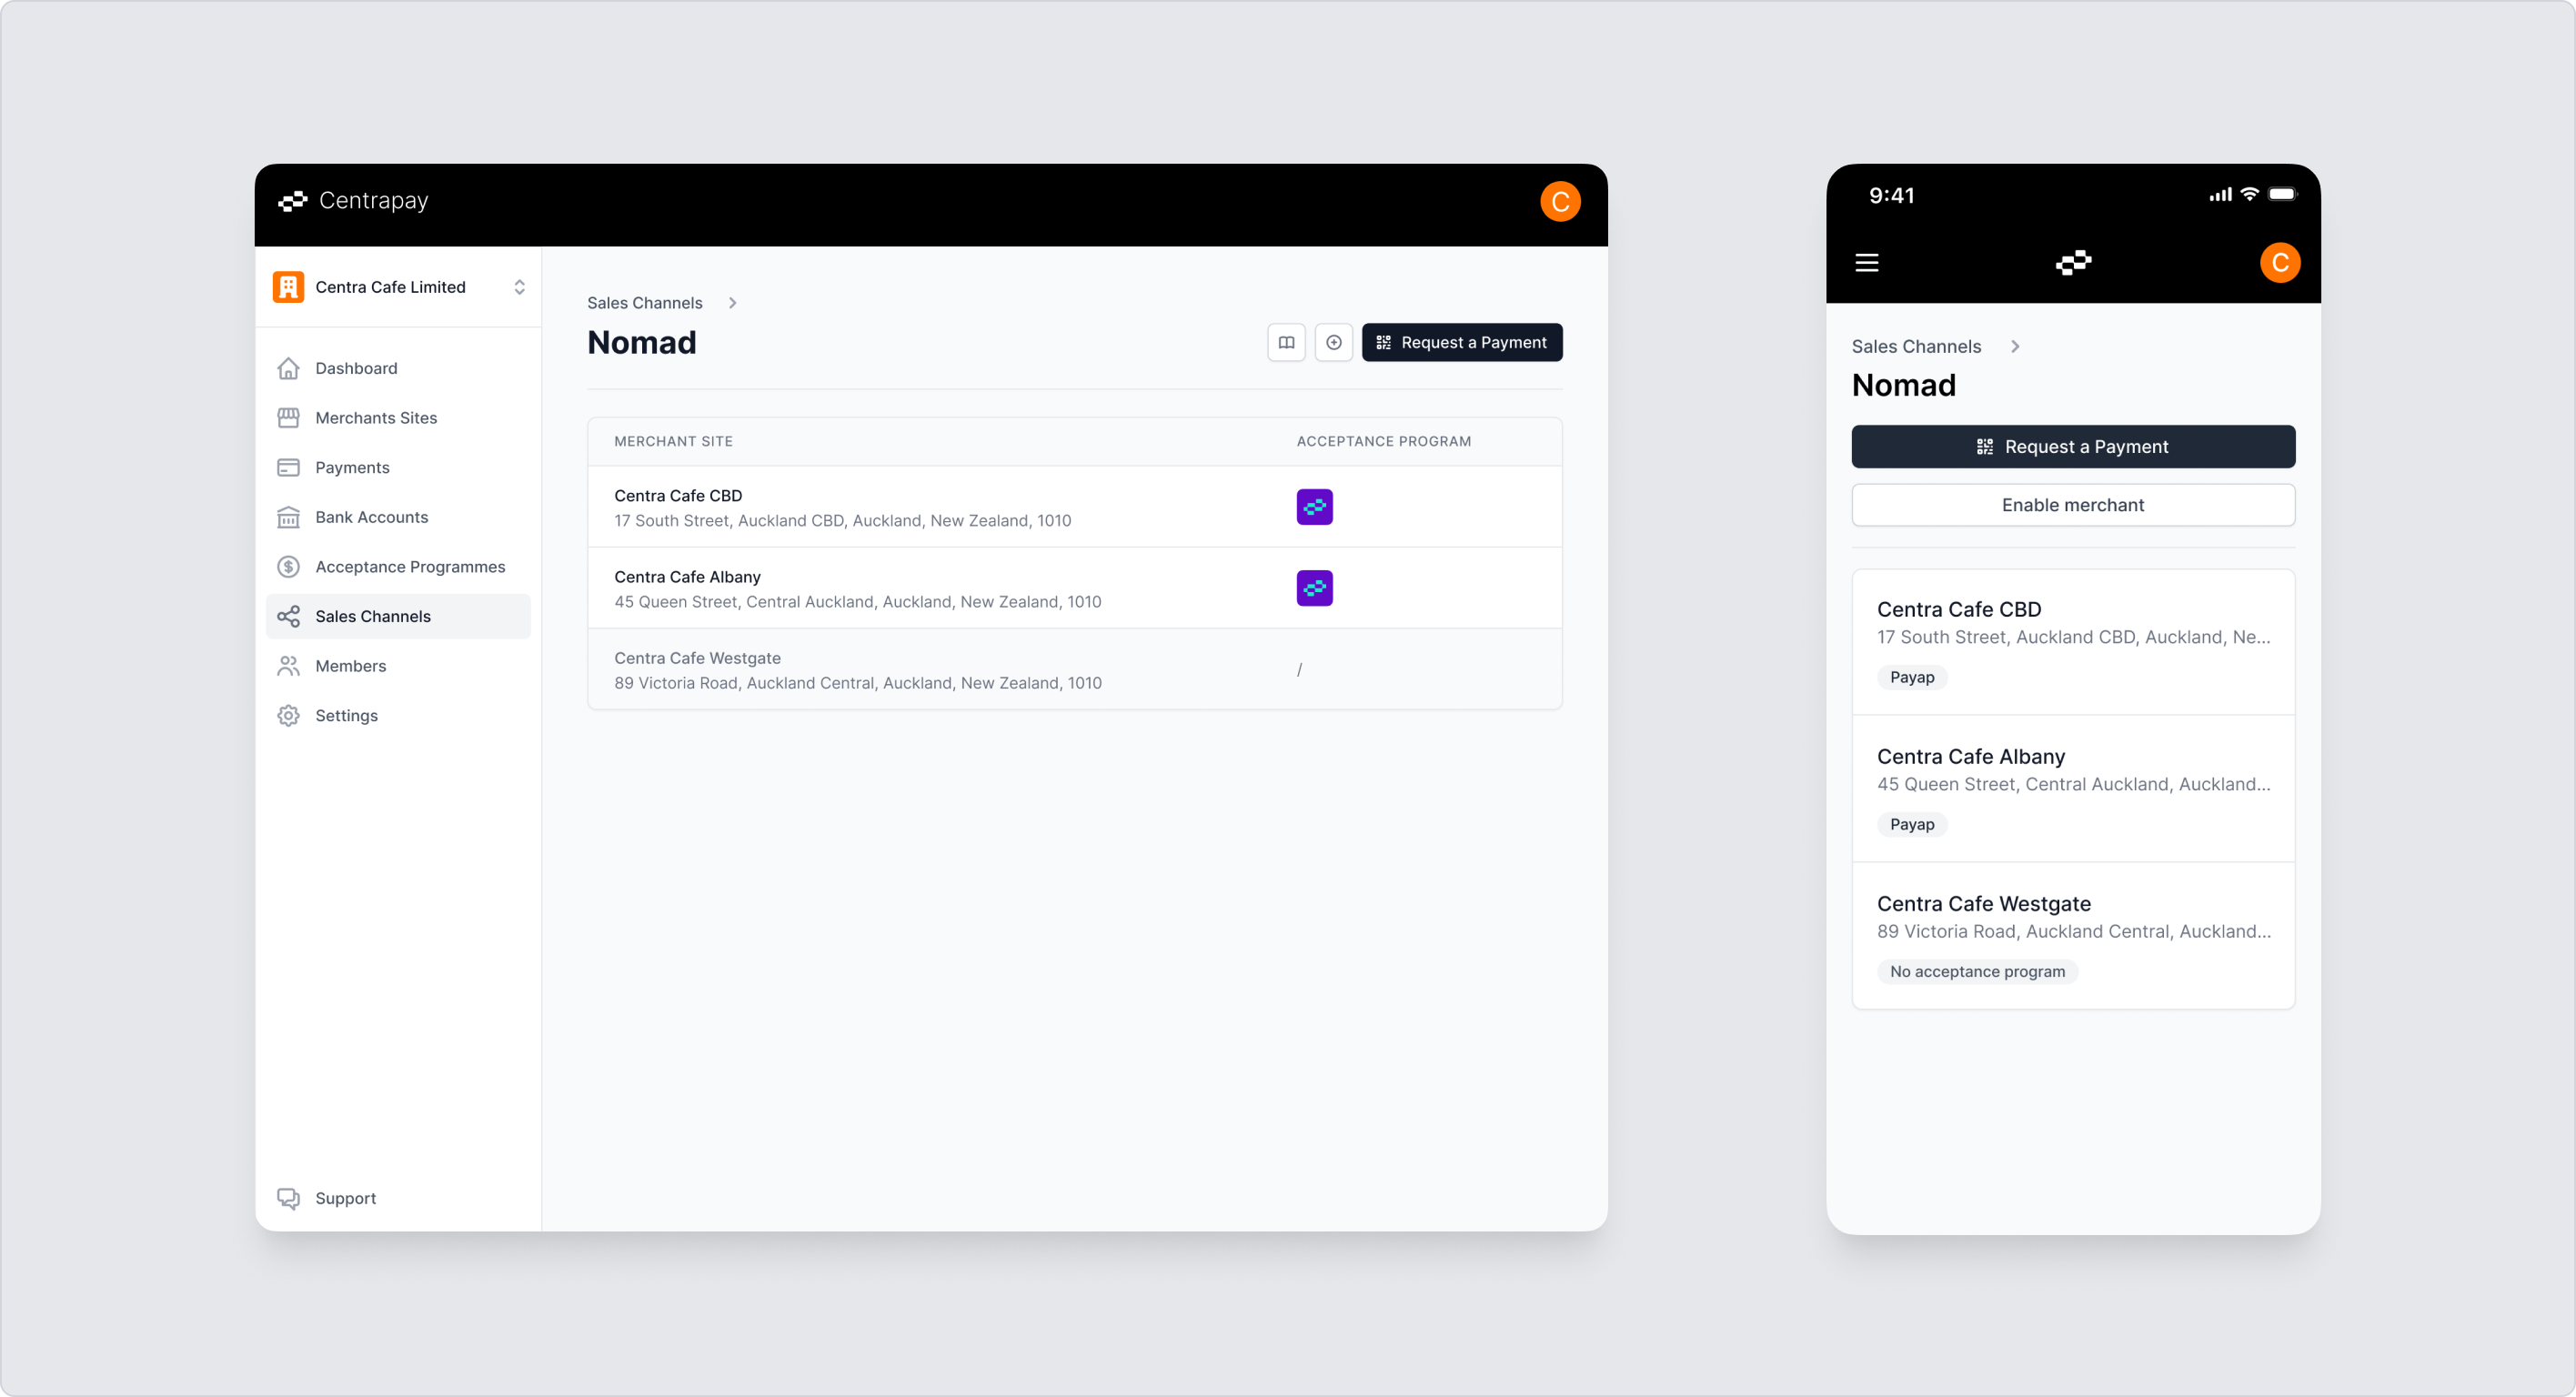
Nomad status and your Acceptance Programmes
Once an active Acceptance Programme is associated with the merchant site, Nomad will be ready to use for that merchant. If a merchant site appears disabled, it means there is no active Acceptance Programme linked to it yet.
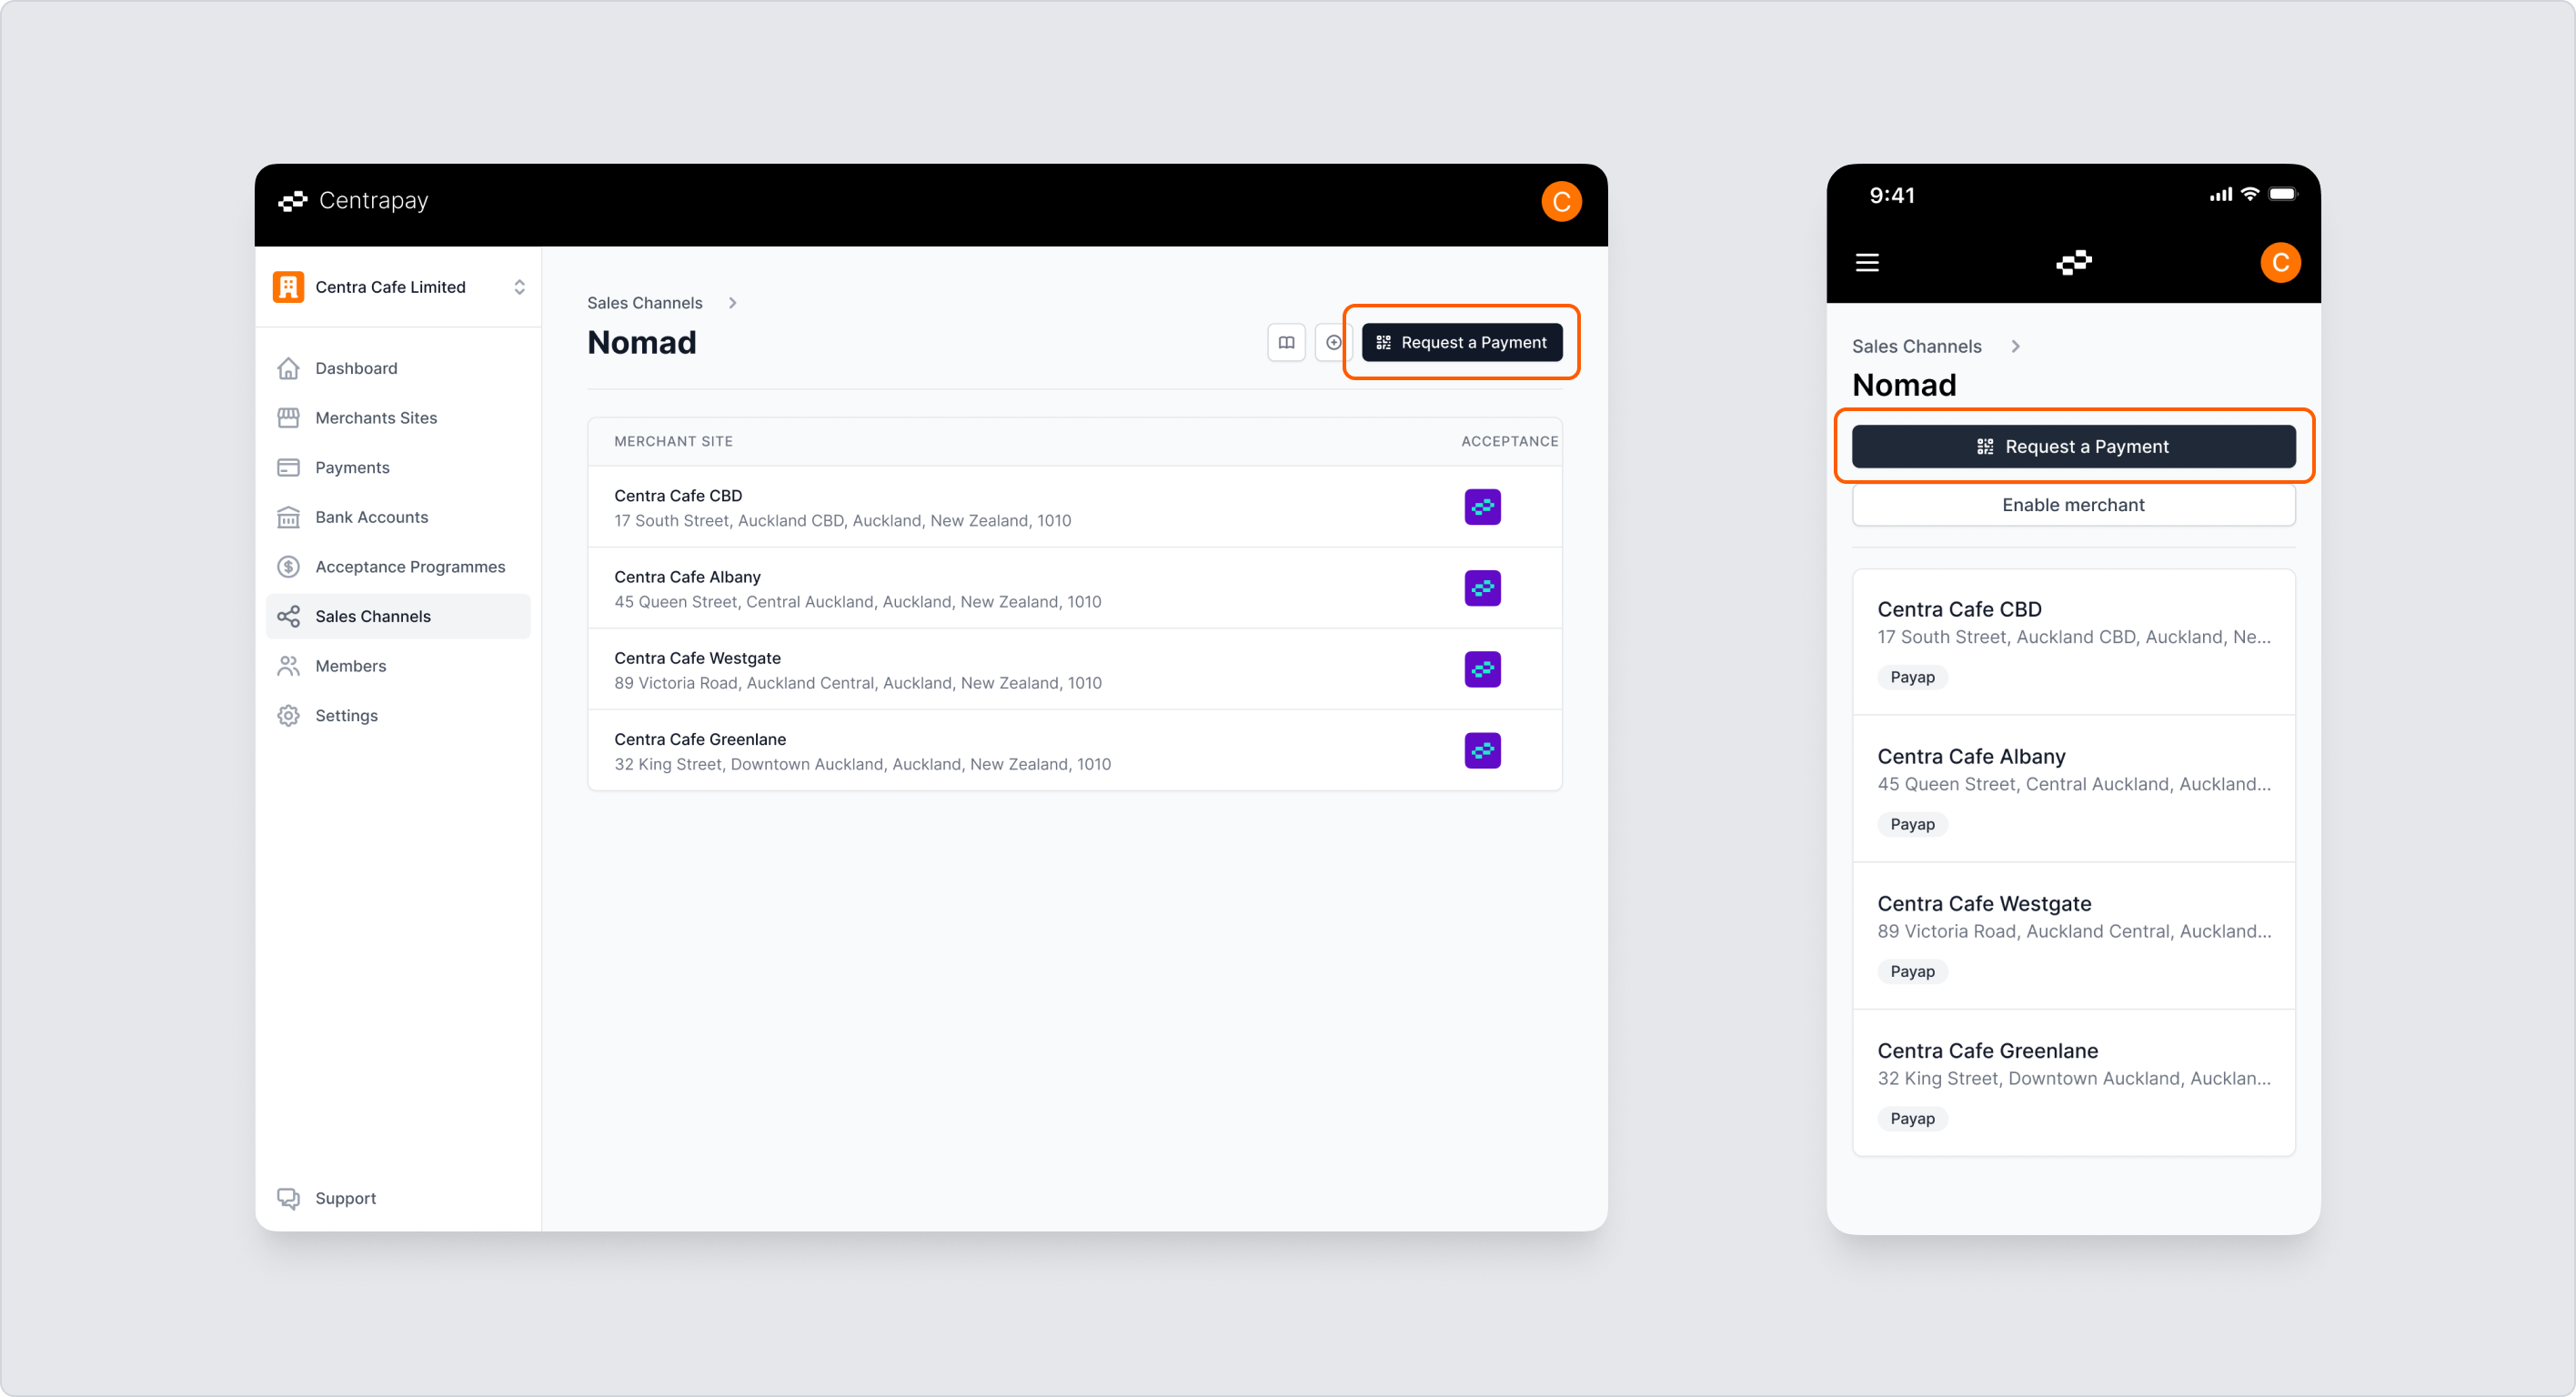
How to use Nomad
Entry points
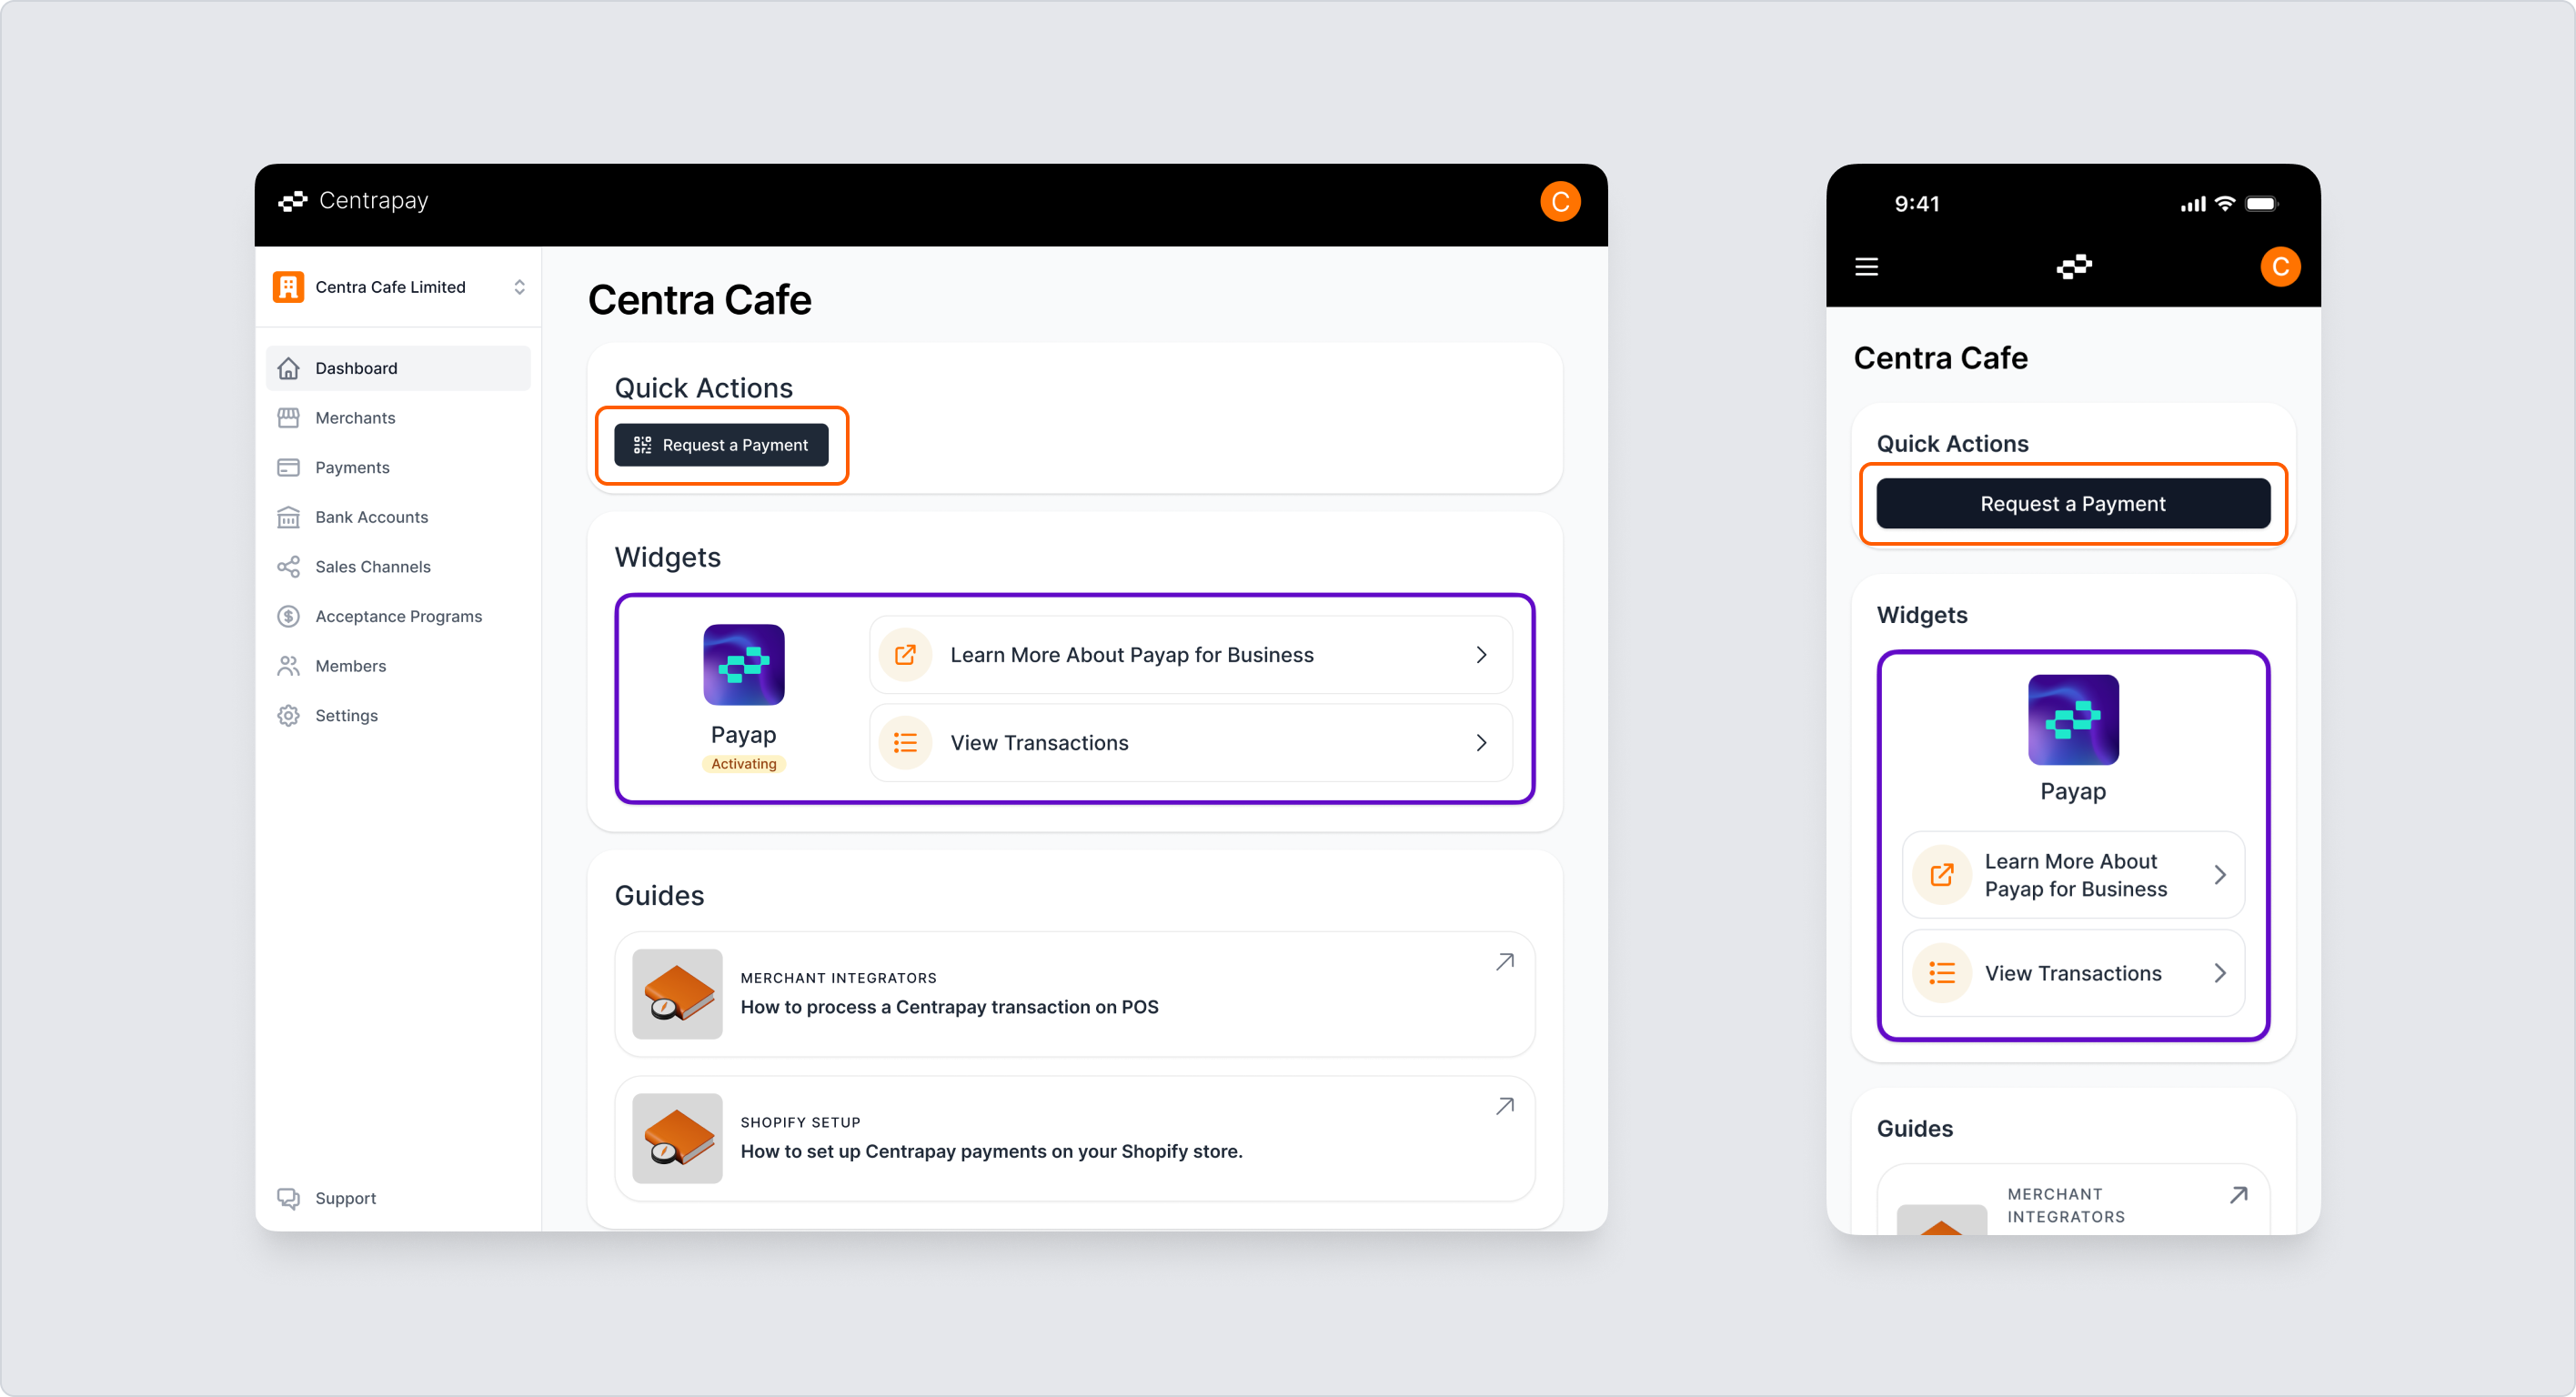
Nomad can be accessed from multiple places in the Business Portal:
Dashboard: A shortcut to Nomad is available on the dashboard for quick access.
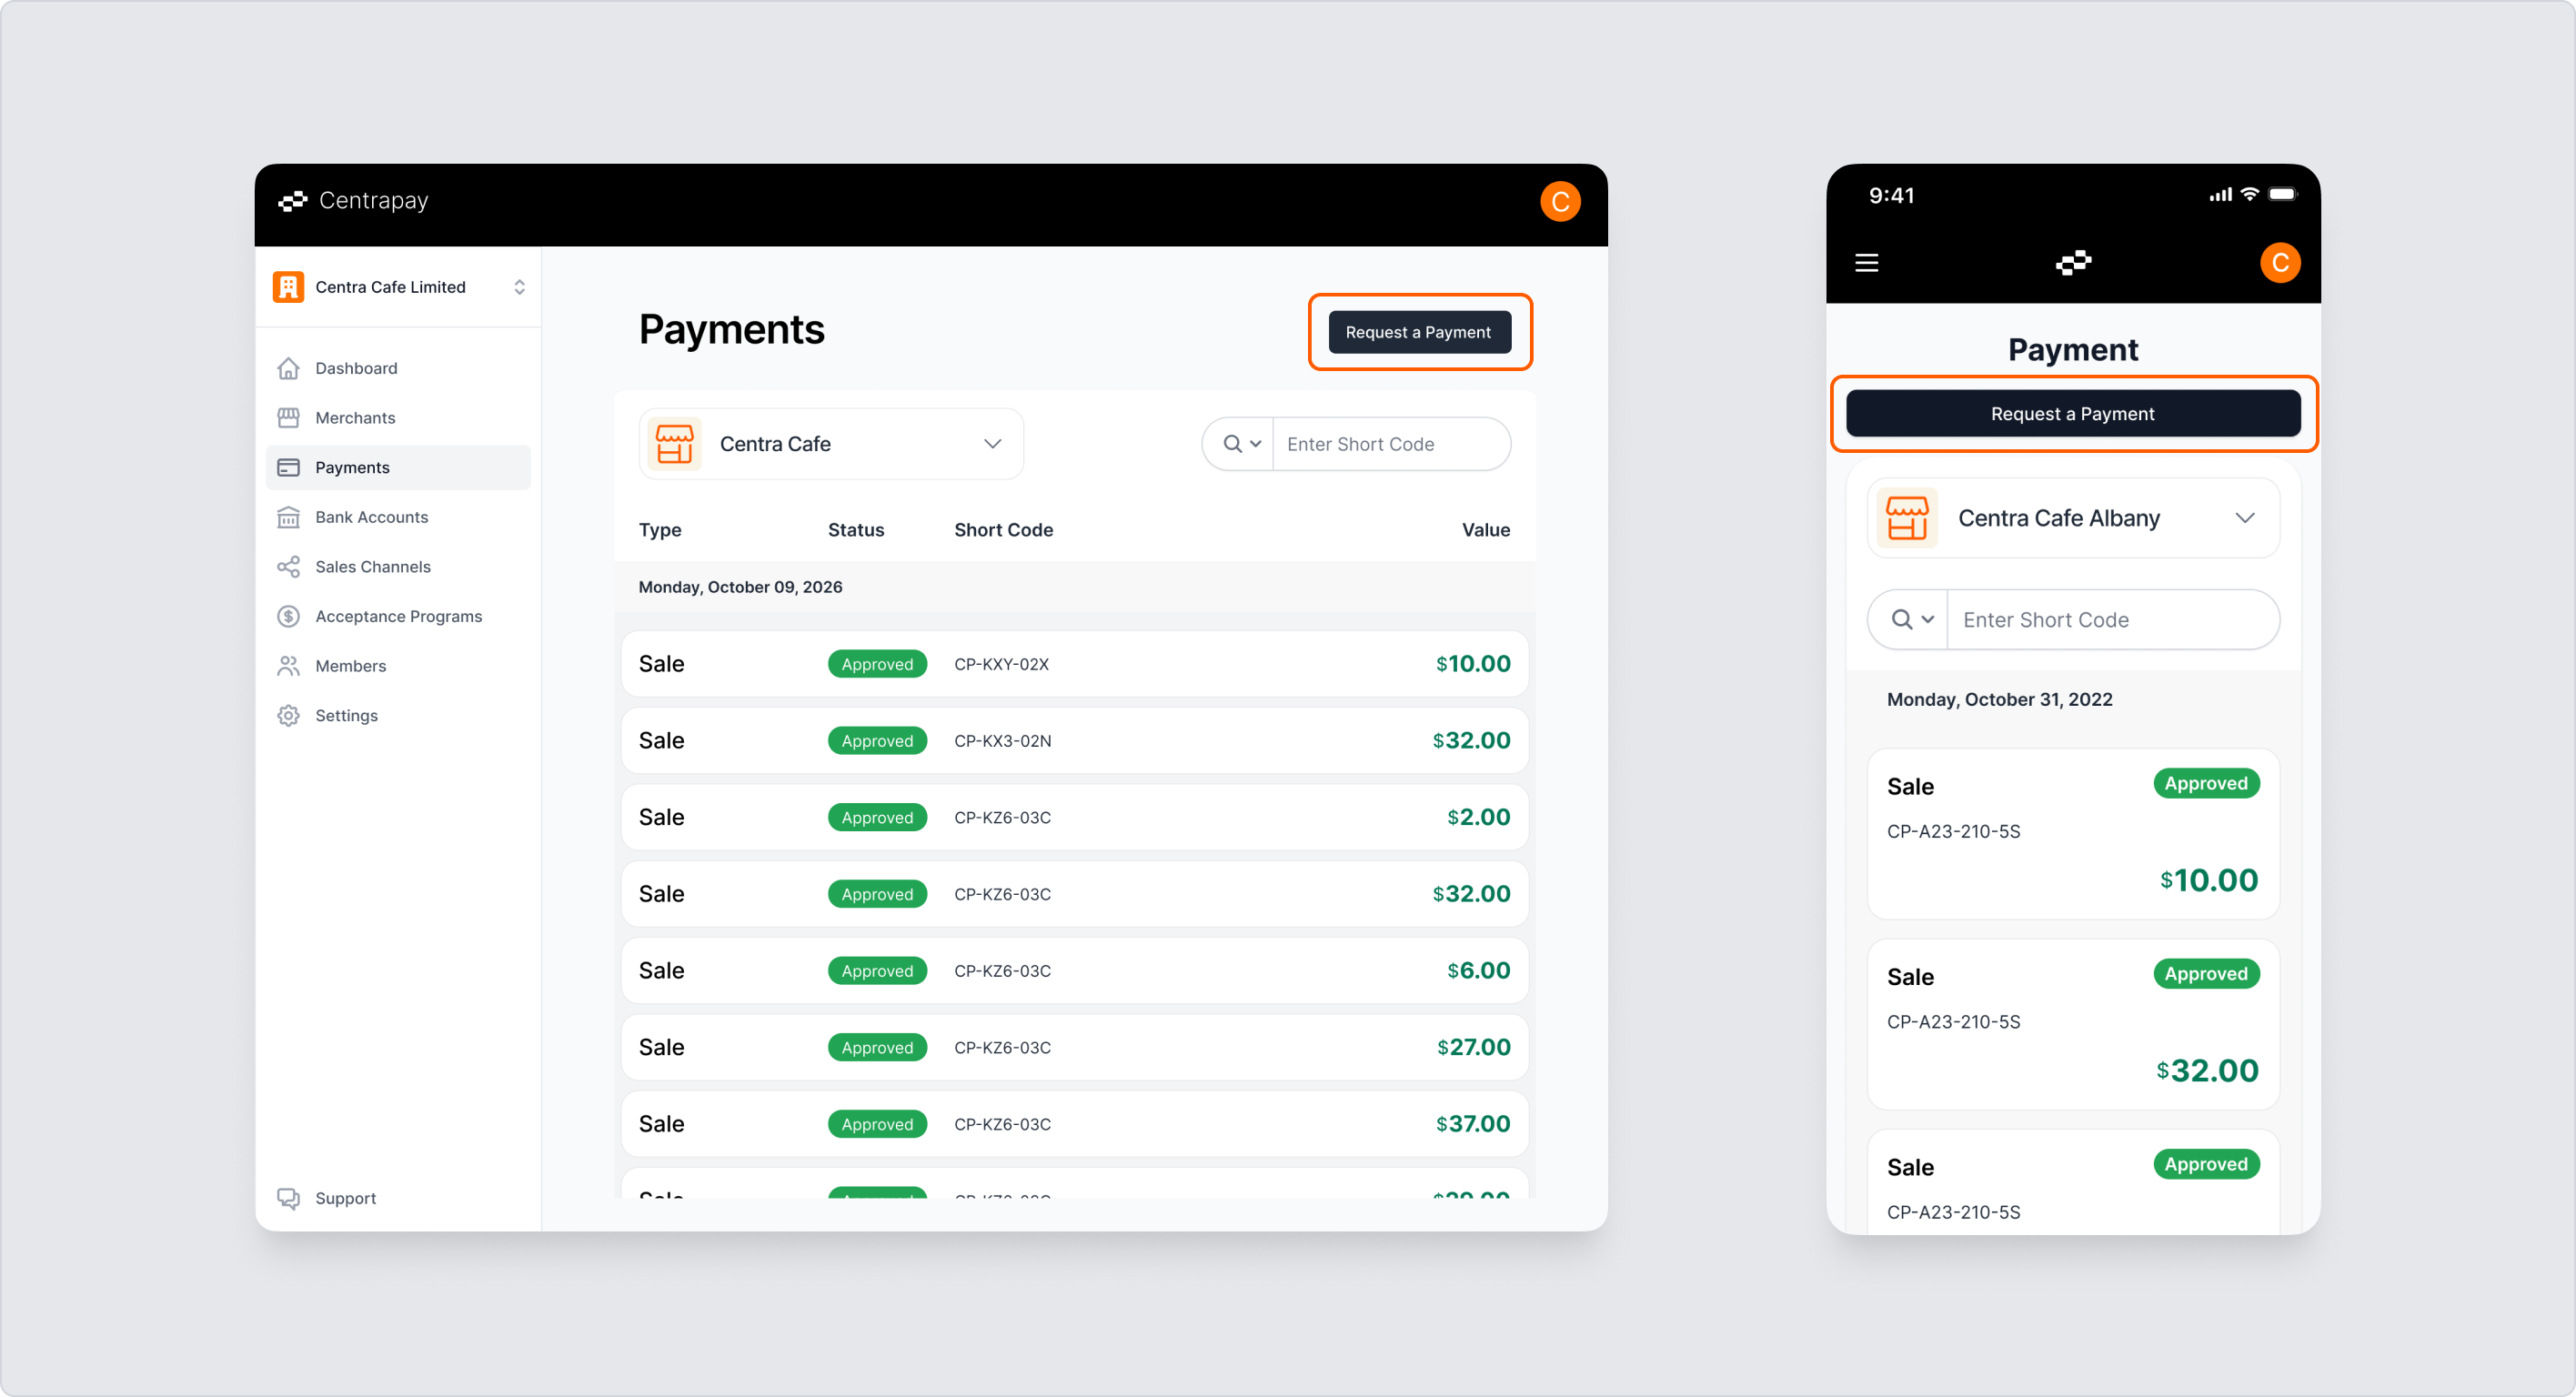
Payments: Access Nomad directly from the Payments section.
Nomad: Open Nomad from the Nomad detail page in Sales Channels.
Mobile
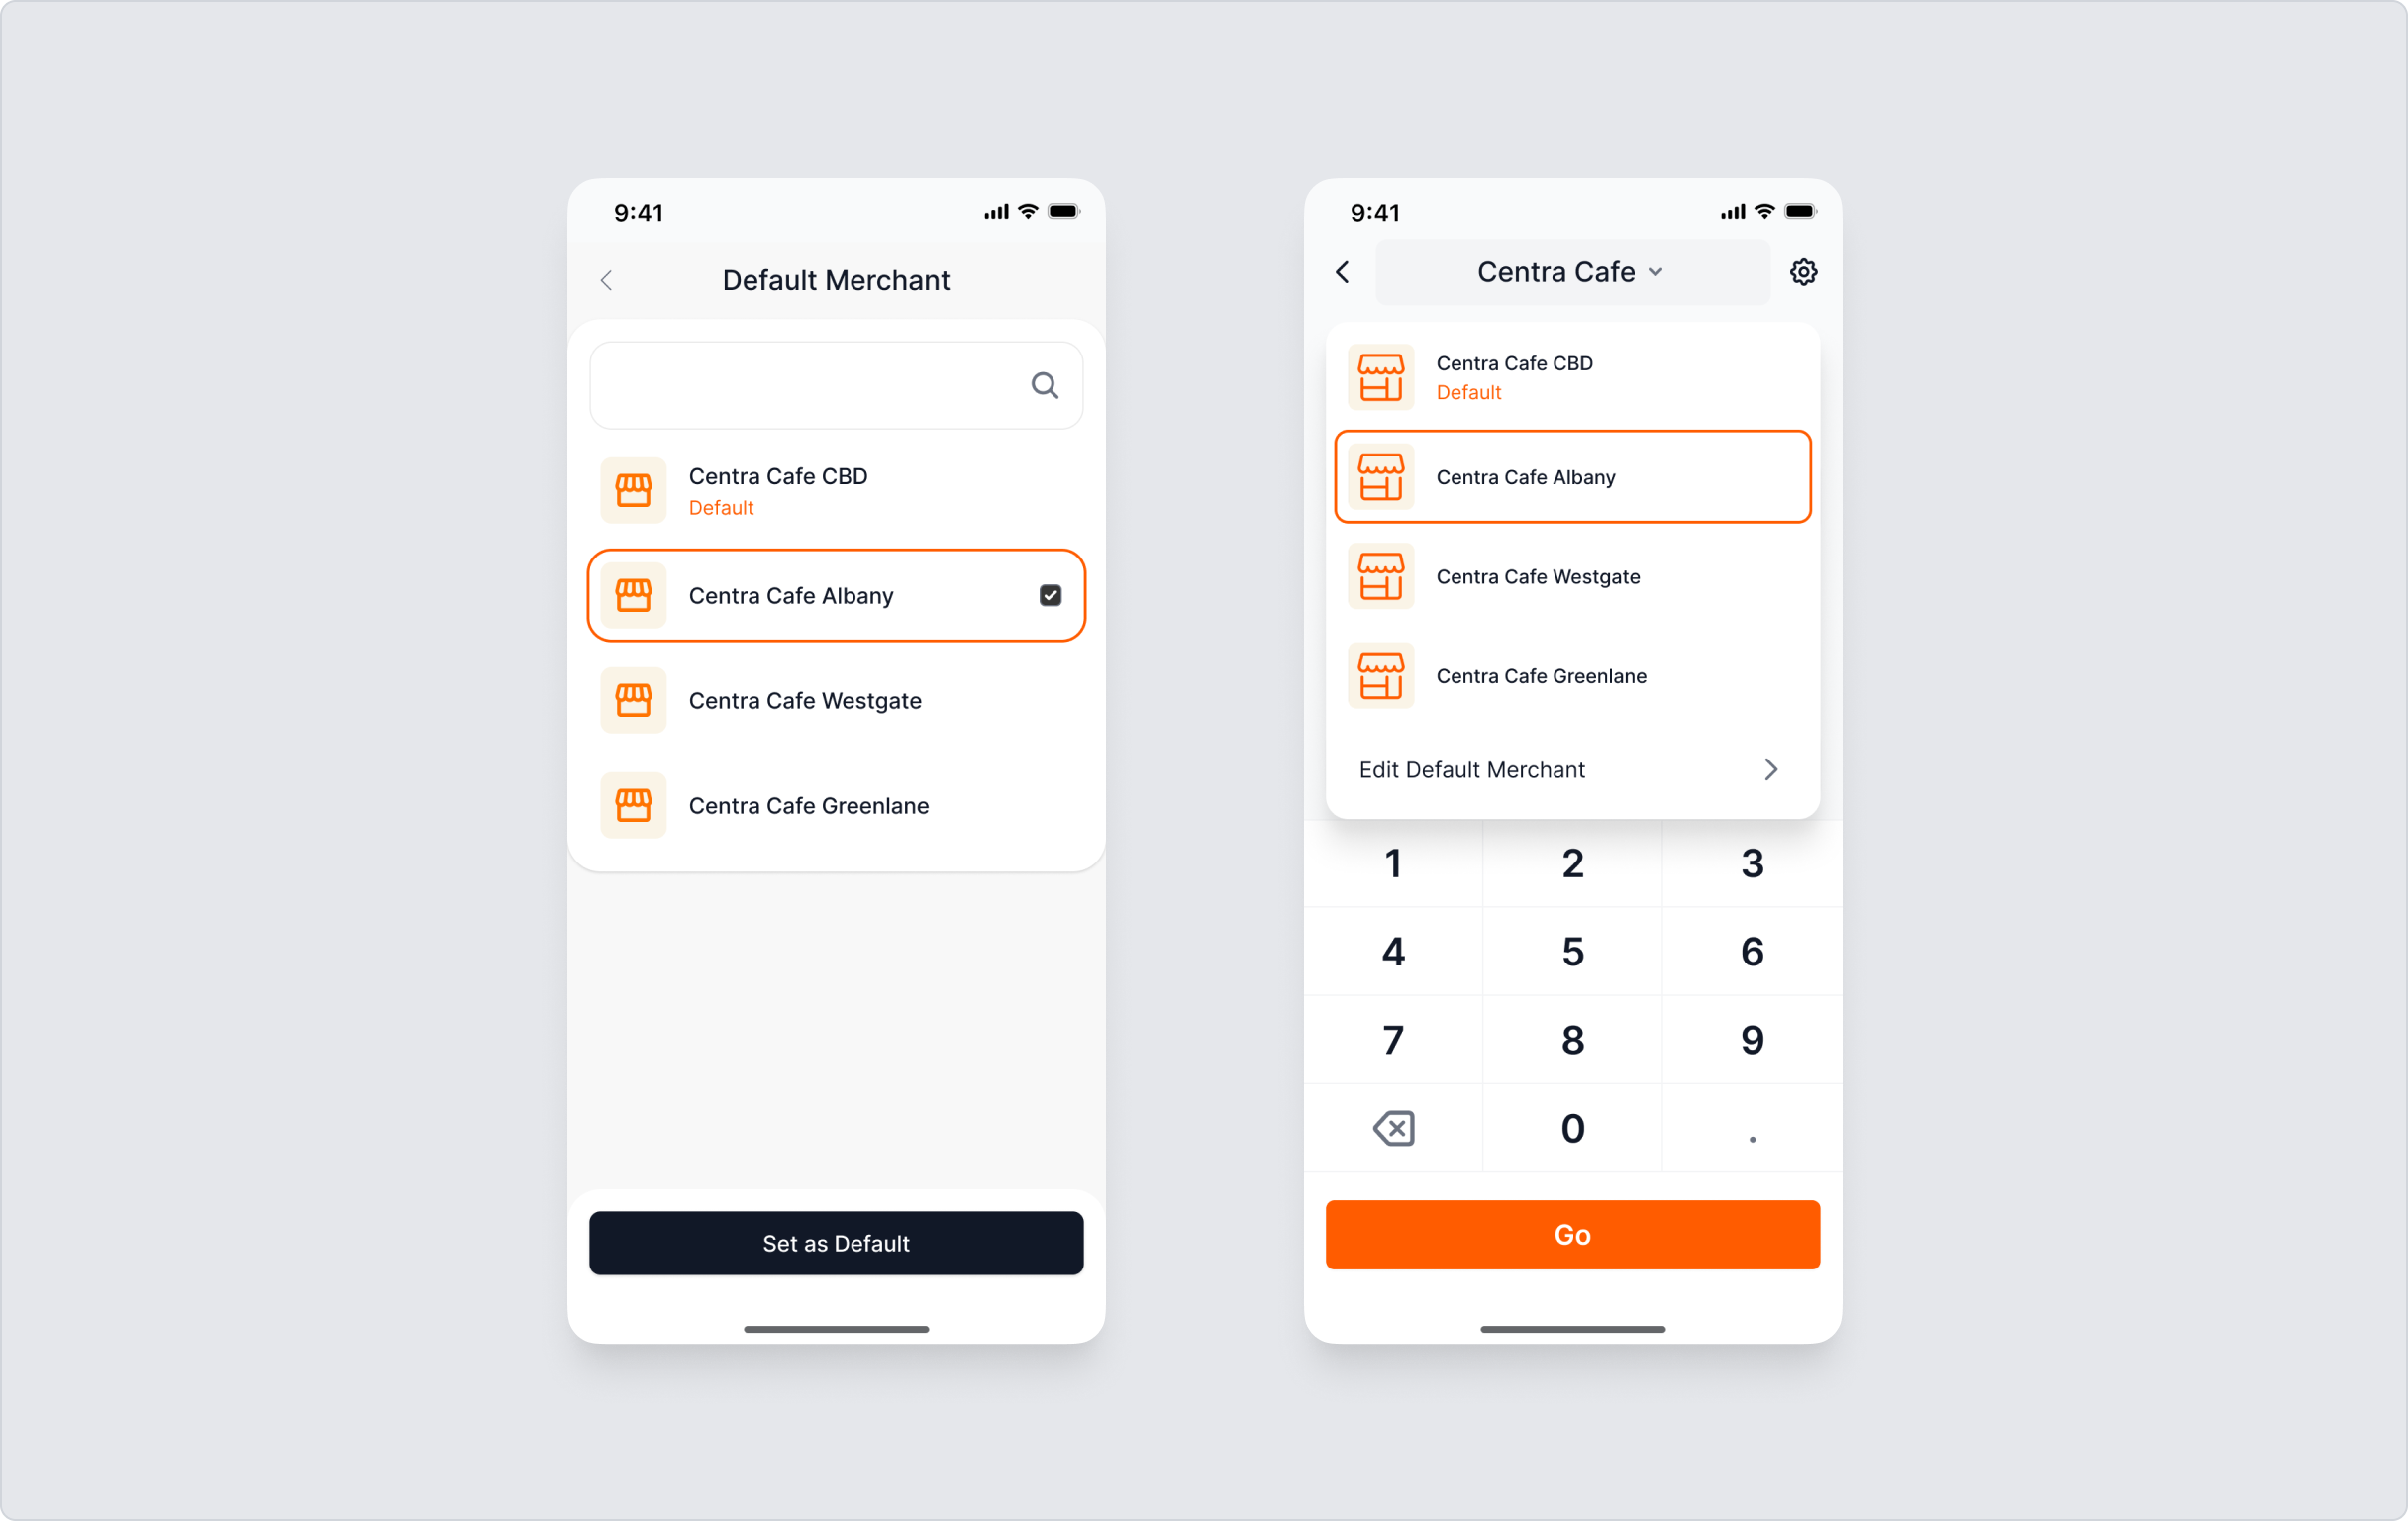
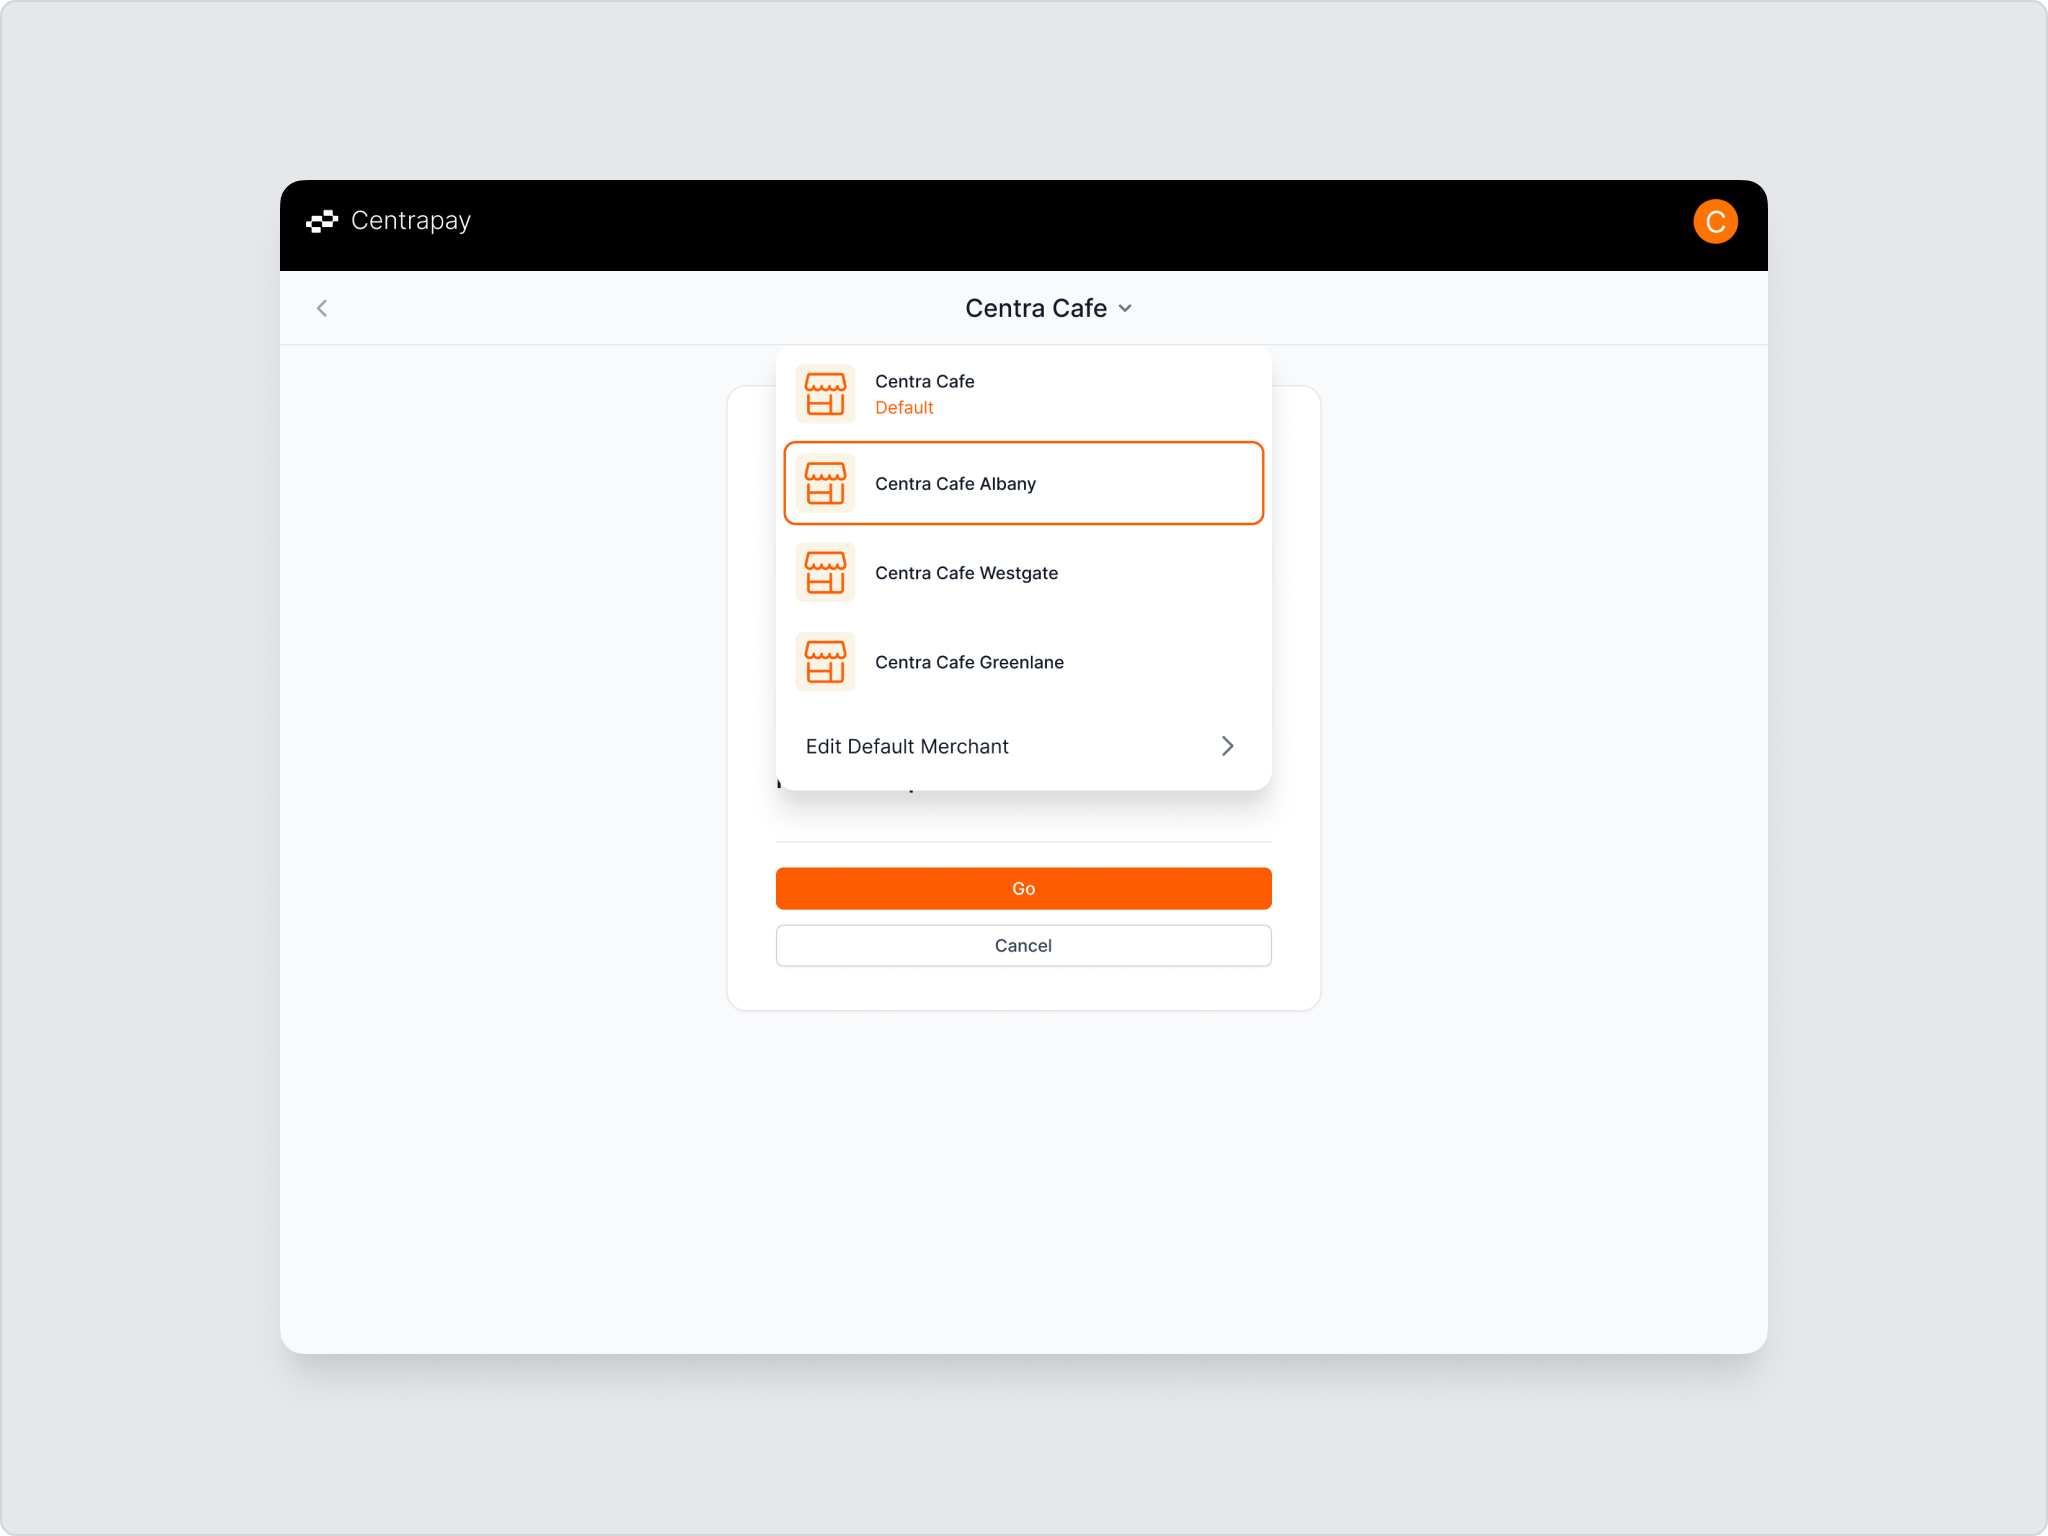
Set a Default Merchant Site
- When entering Nomad for the first time, you'll need to select a default merchant site. You can also switch between different merchant sites at any time from the top of the Nomad page.
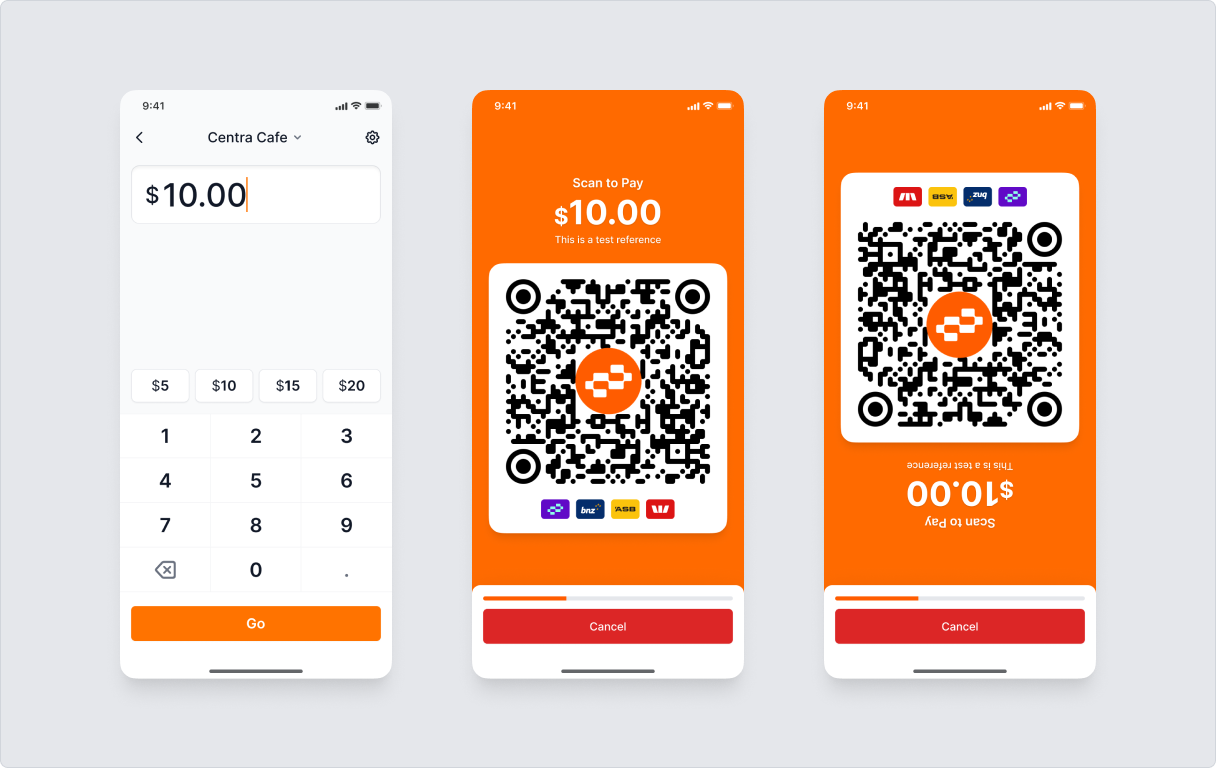
Initiate a Transaction
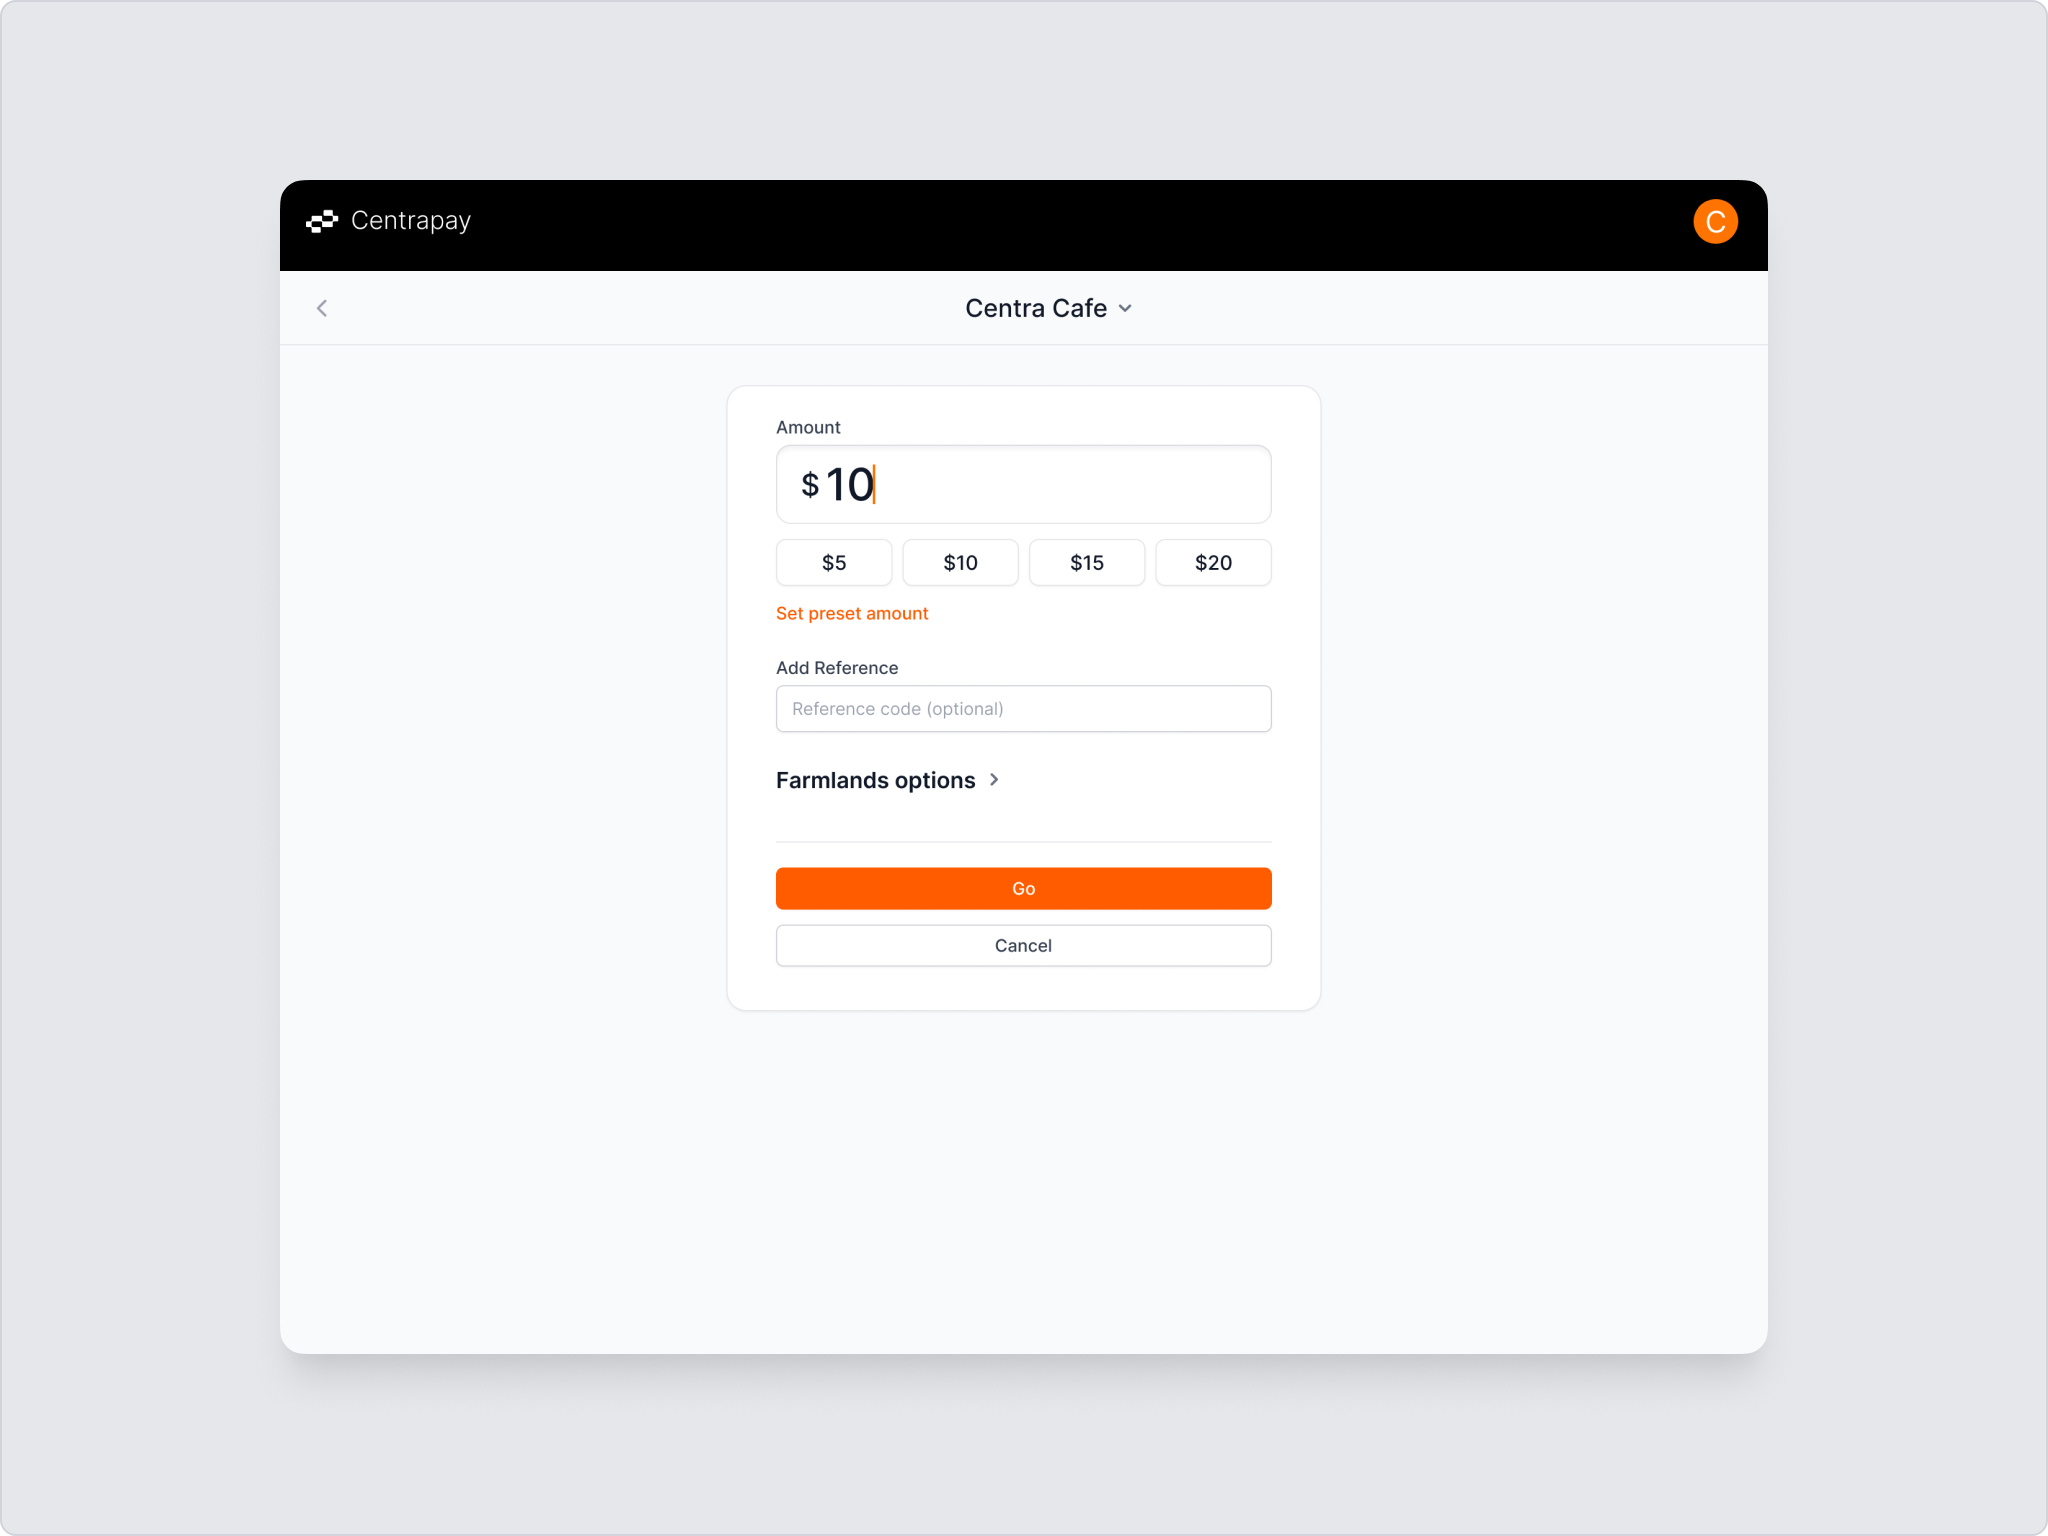
On the Nomad page, enter the amount and tap Go to generate a payment QR code.
Users can scan the QR code with Payap or their phone camera to make a payment. Double-tap the page to flip the screen so the amount and QR code face the customer.
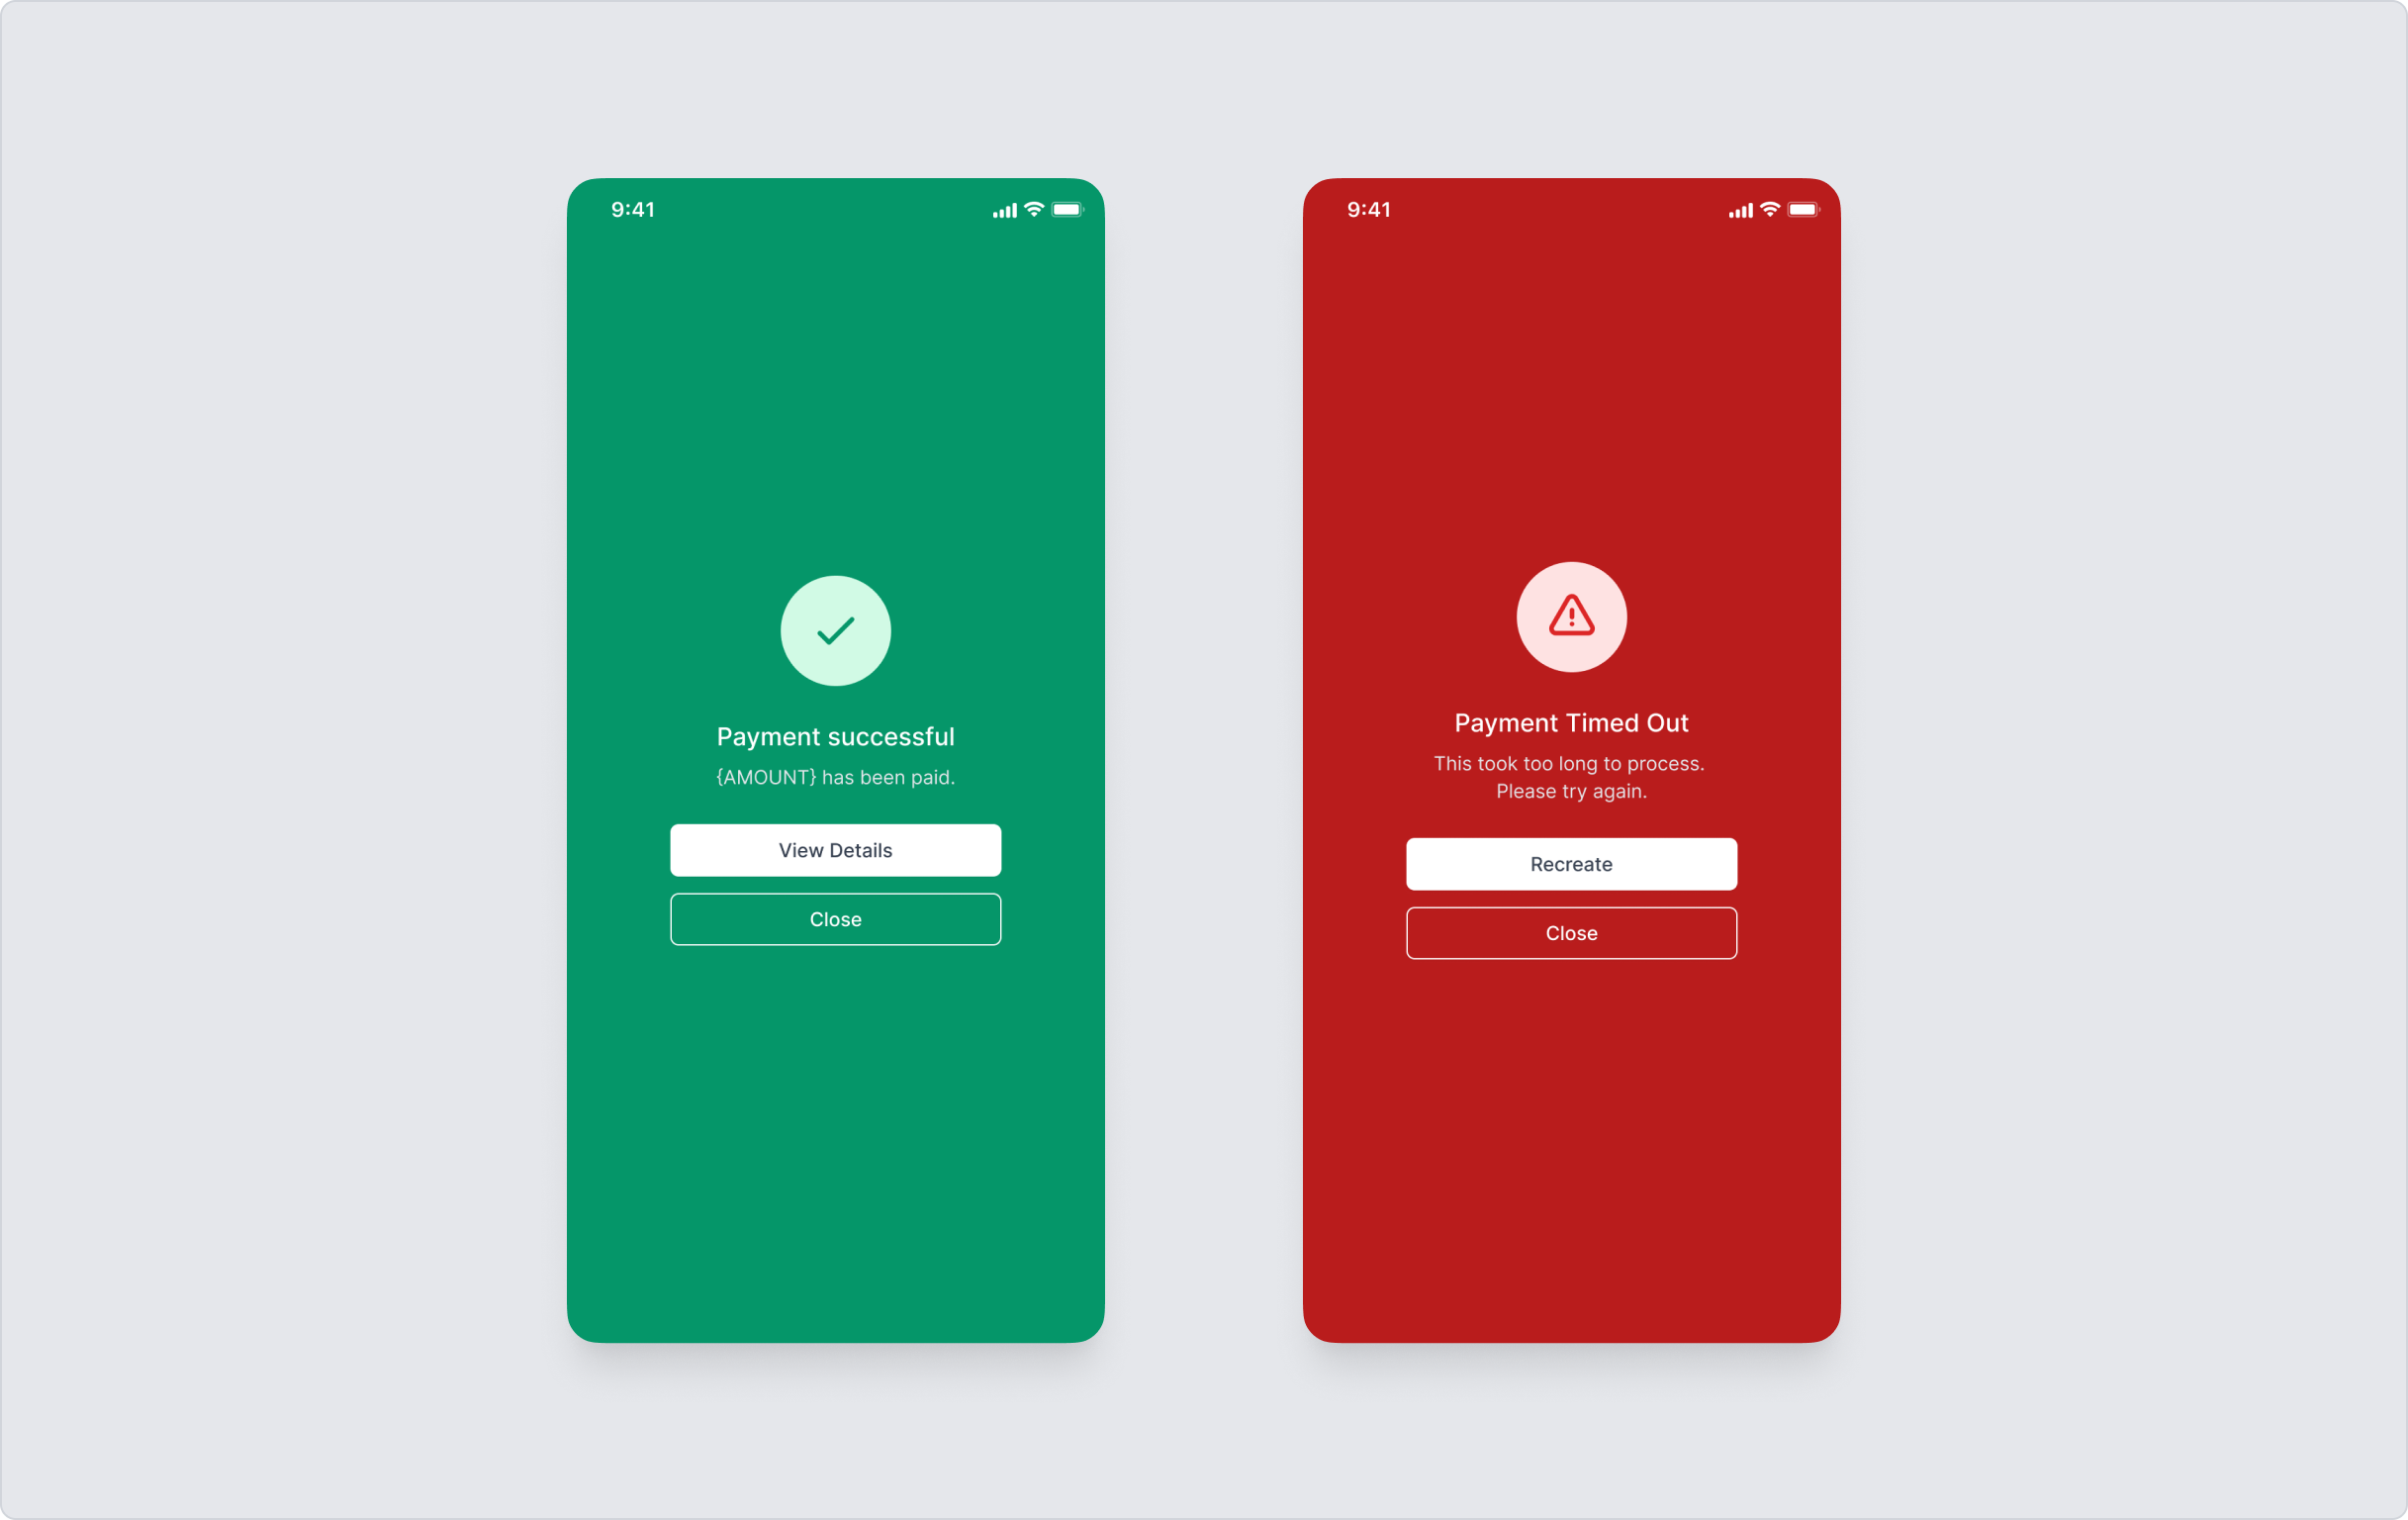
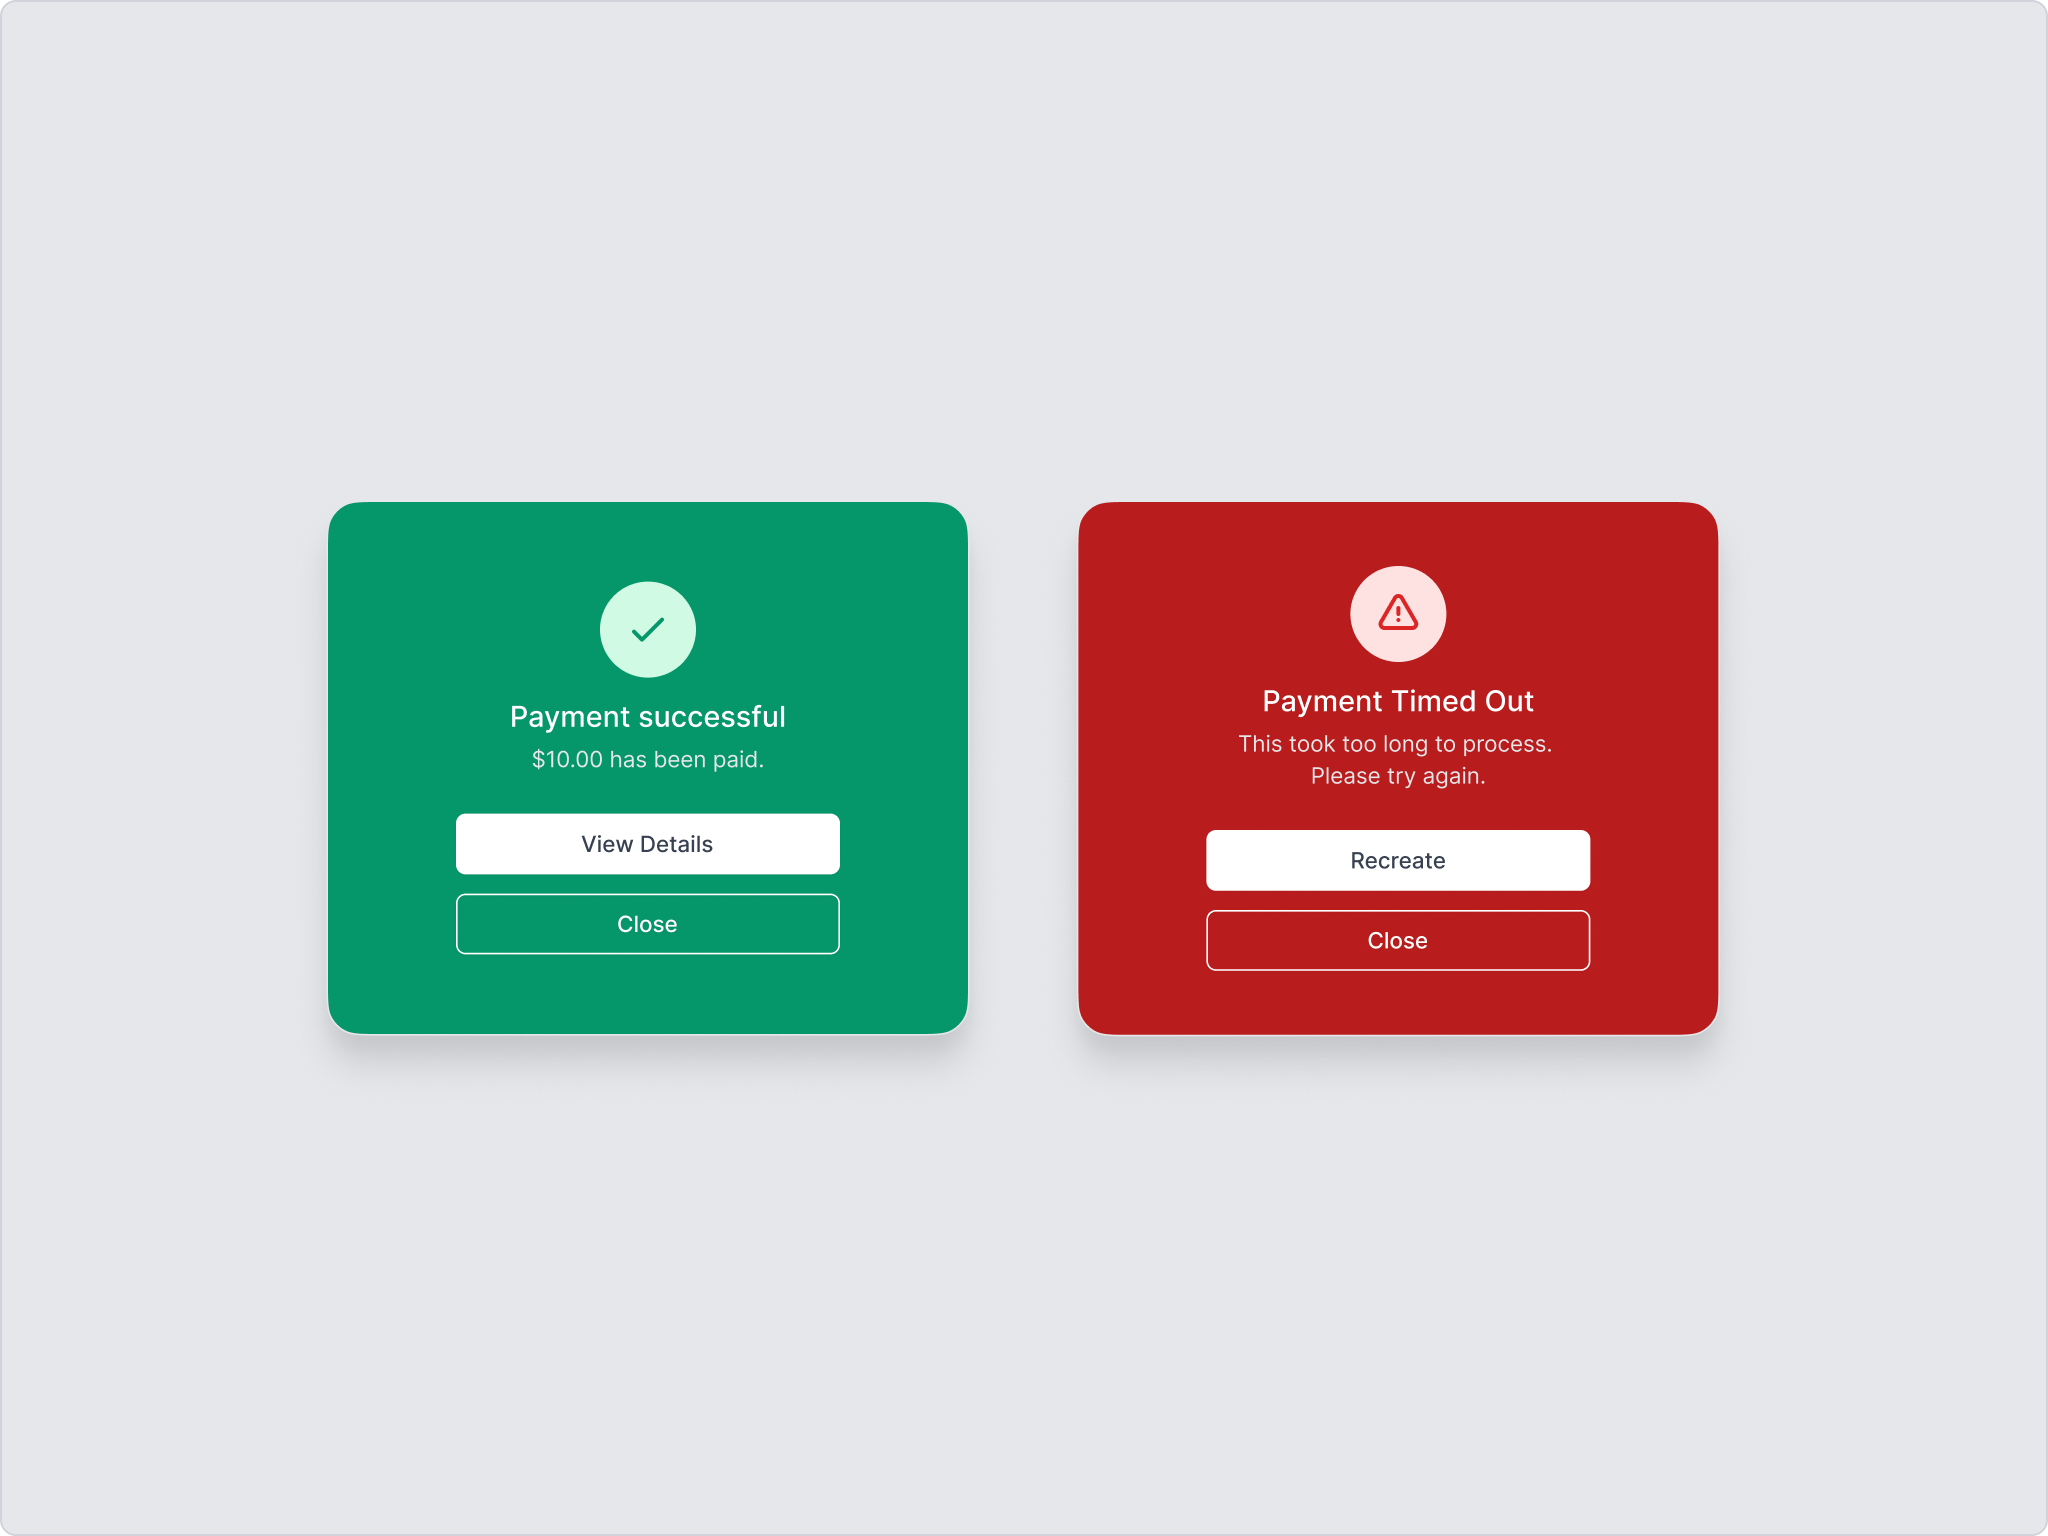
You will see a confirmation once the payment is successful. If the payment is not completed within the 2-minute countdown, a failure page will appear. You can still tap Recreate Request to quickly resend the same payment request.
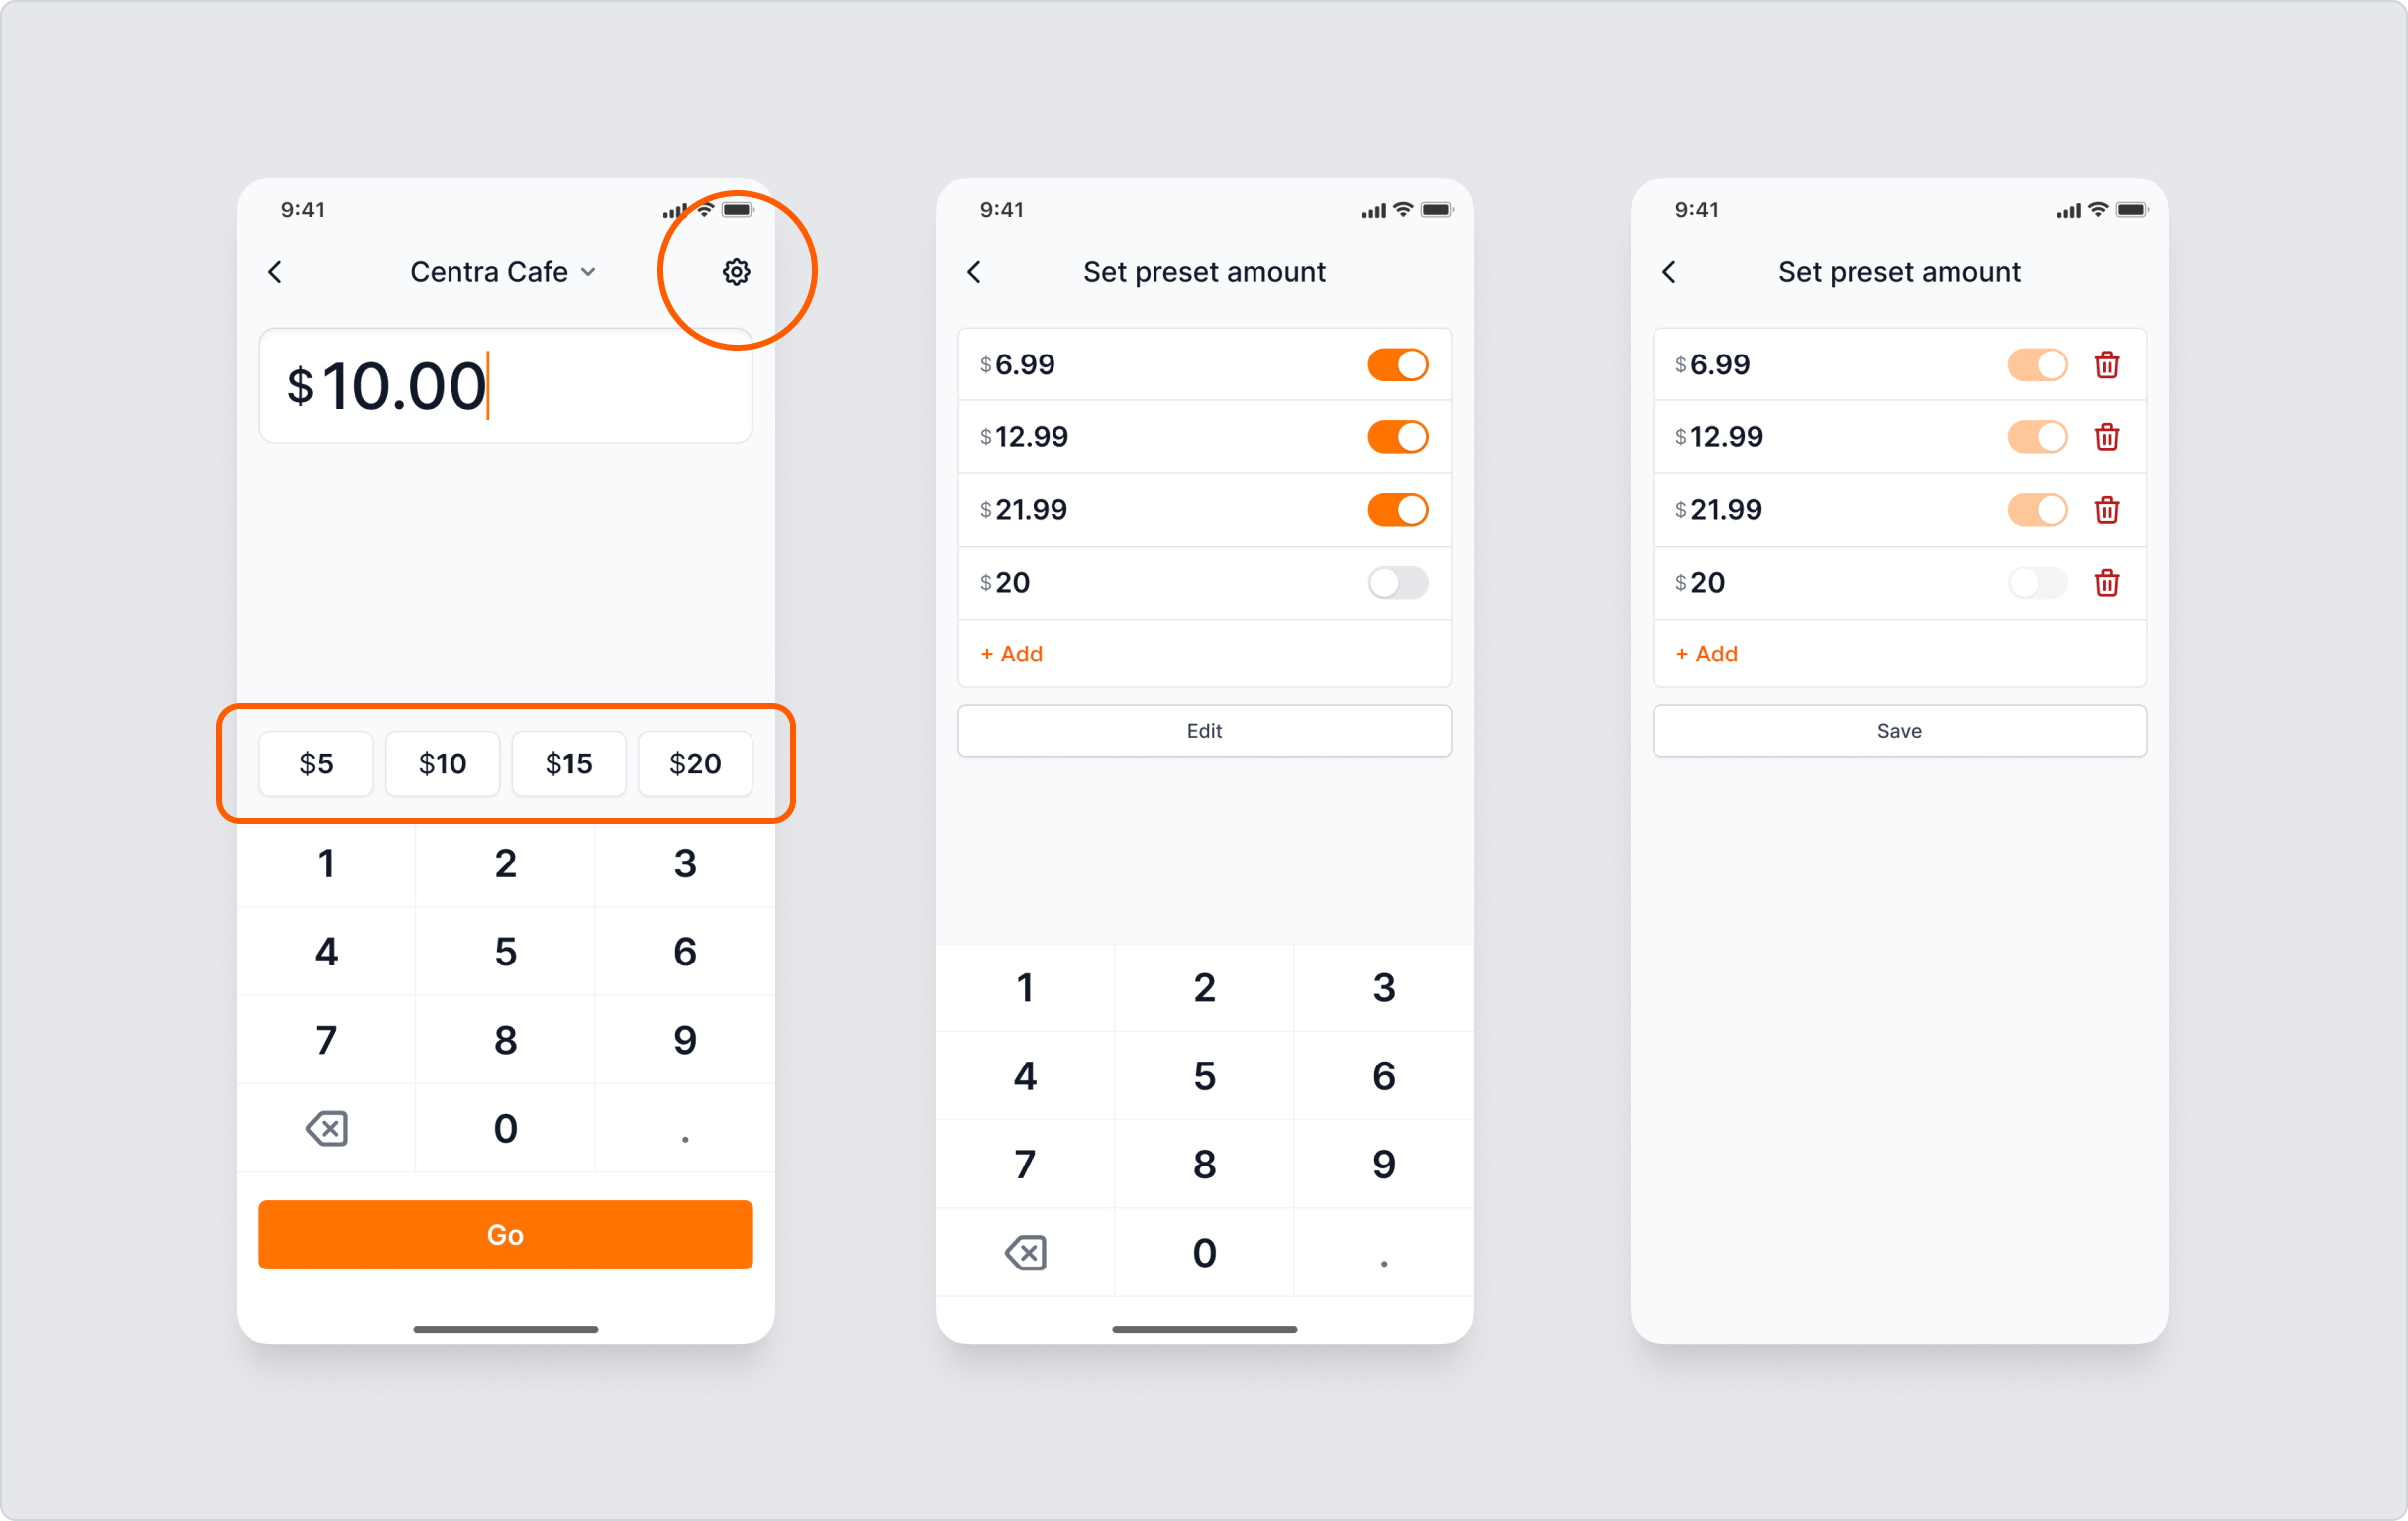
Preset Amounts
The numbers above the keyboard are preset amounts. Tap them to quickly change the amount.
To manage preset amounts, tap Settings in the top-right corner of the Nomad page. Here you can modify preset amounts or choose whether to display them. You can also tap Edit to manage items, such as deleting those you don't need.
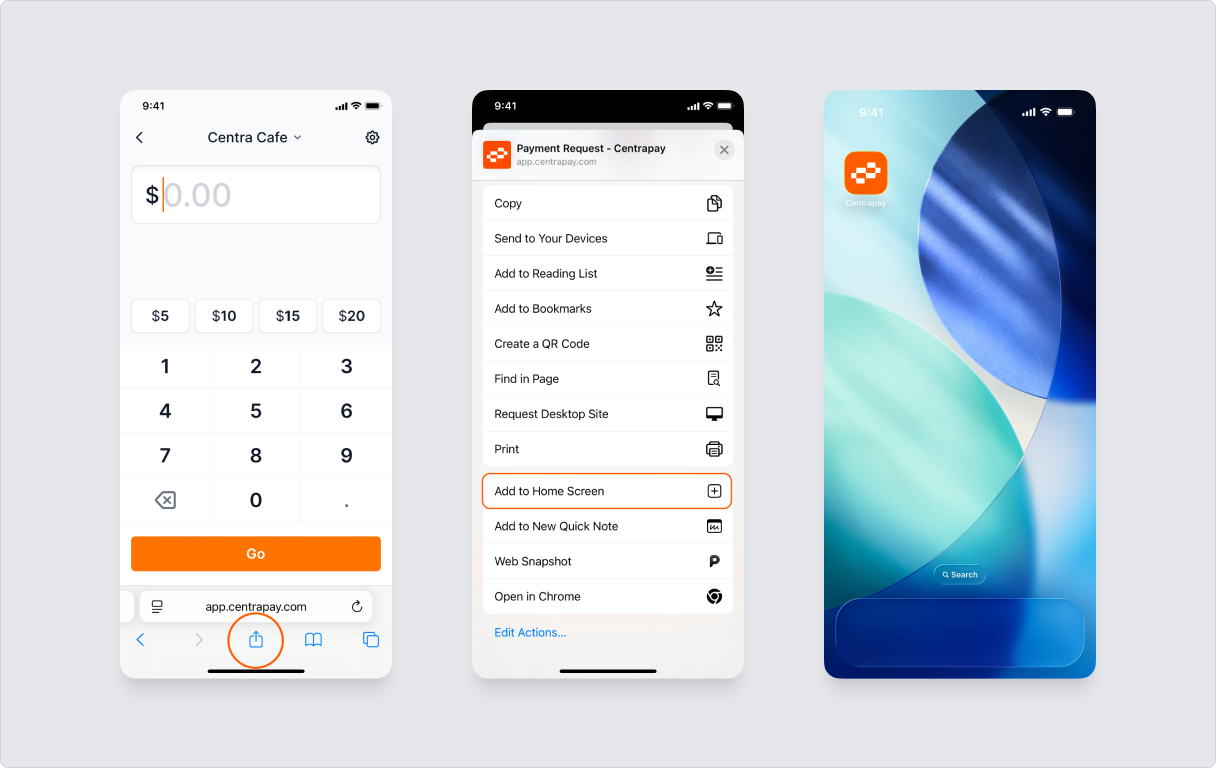
Save This Page to Your Phone Home Screen for Quick Access
Chrome: Tap the Share button on the right side of the address bar.
Safari: Tap the Share button at the bottom of the navigation bar.
Select Add to Home Screen and tap Add.
The shortcut will now appear on your home screen for quick access.
Desktop
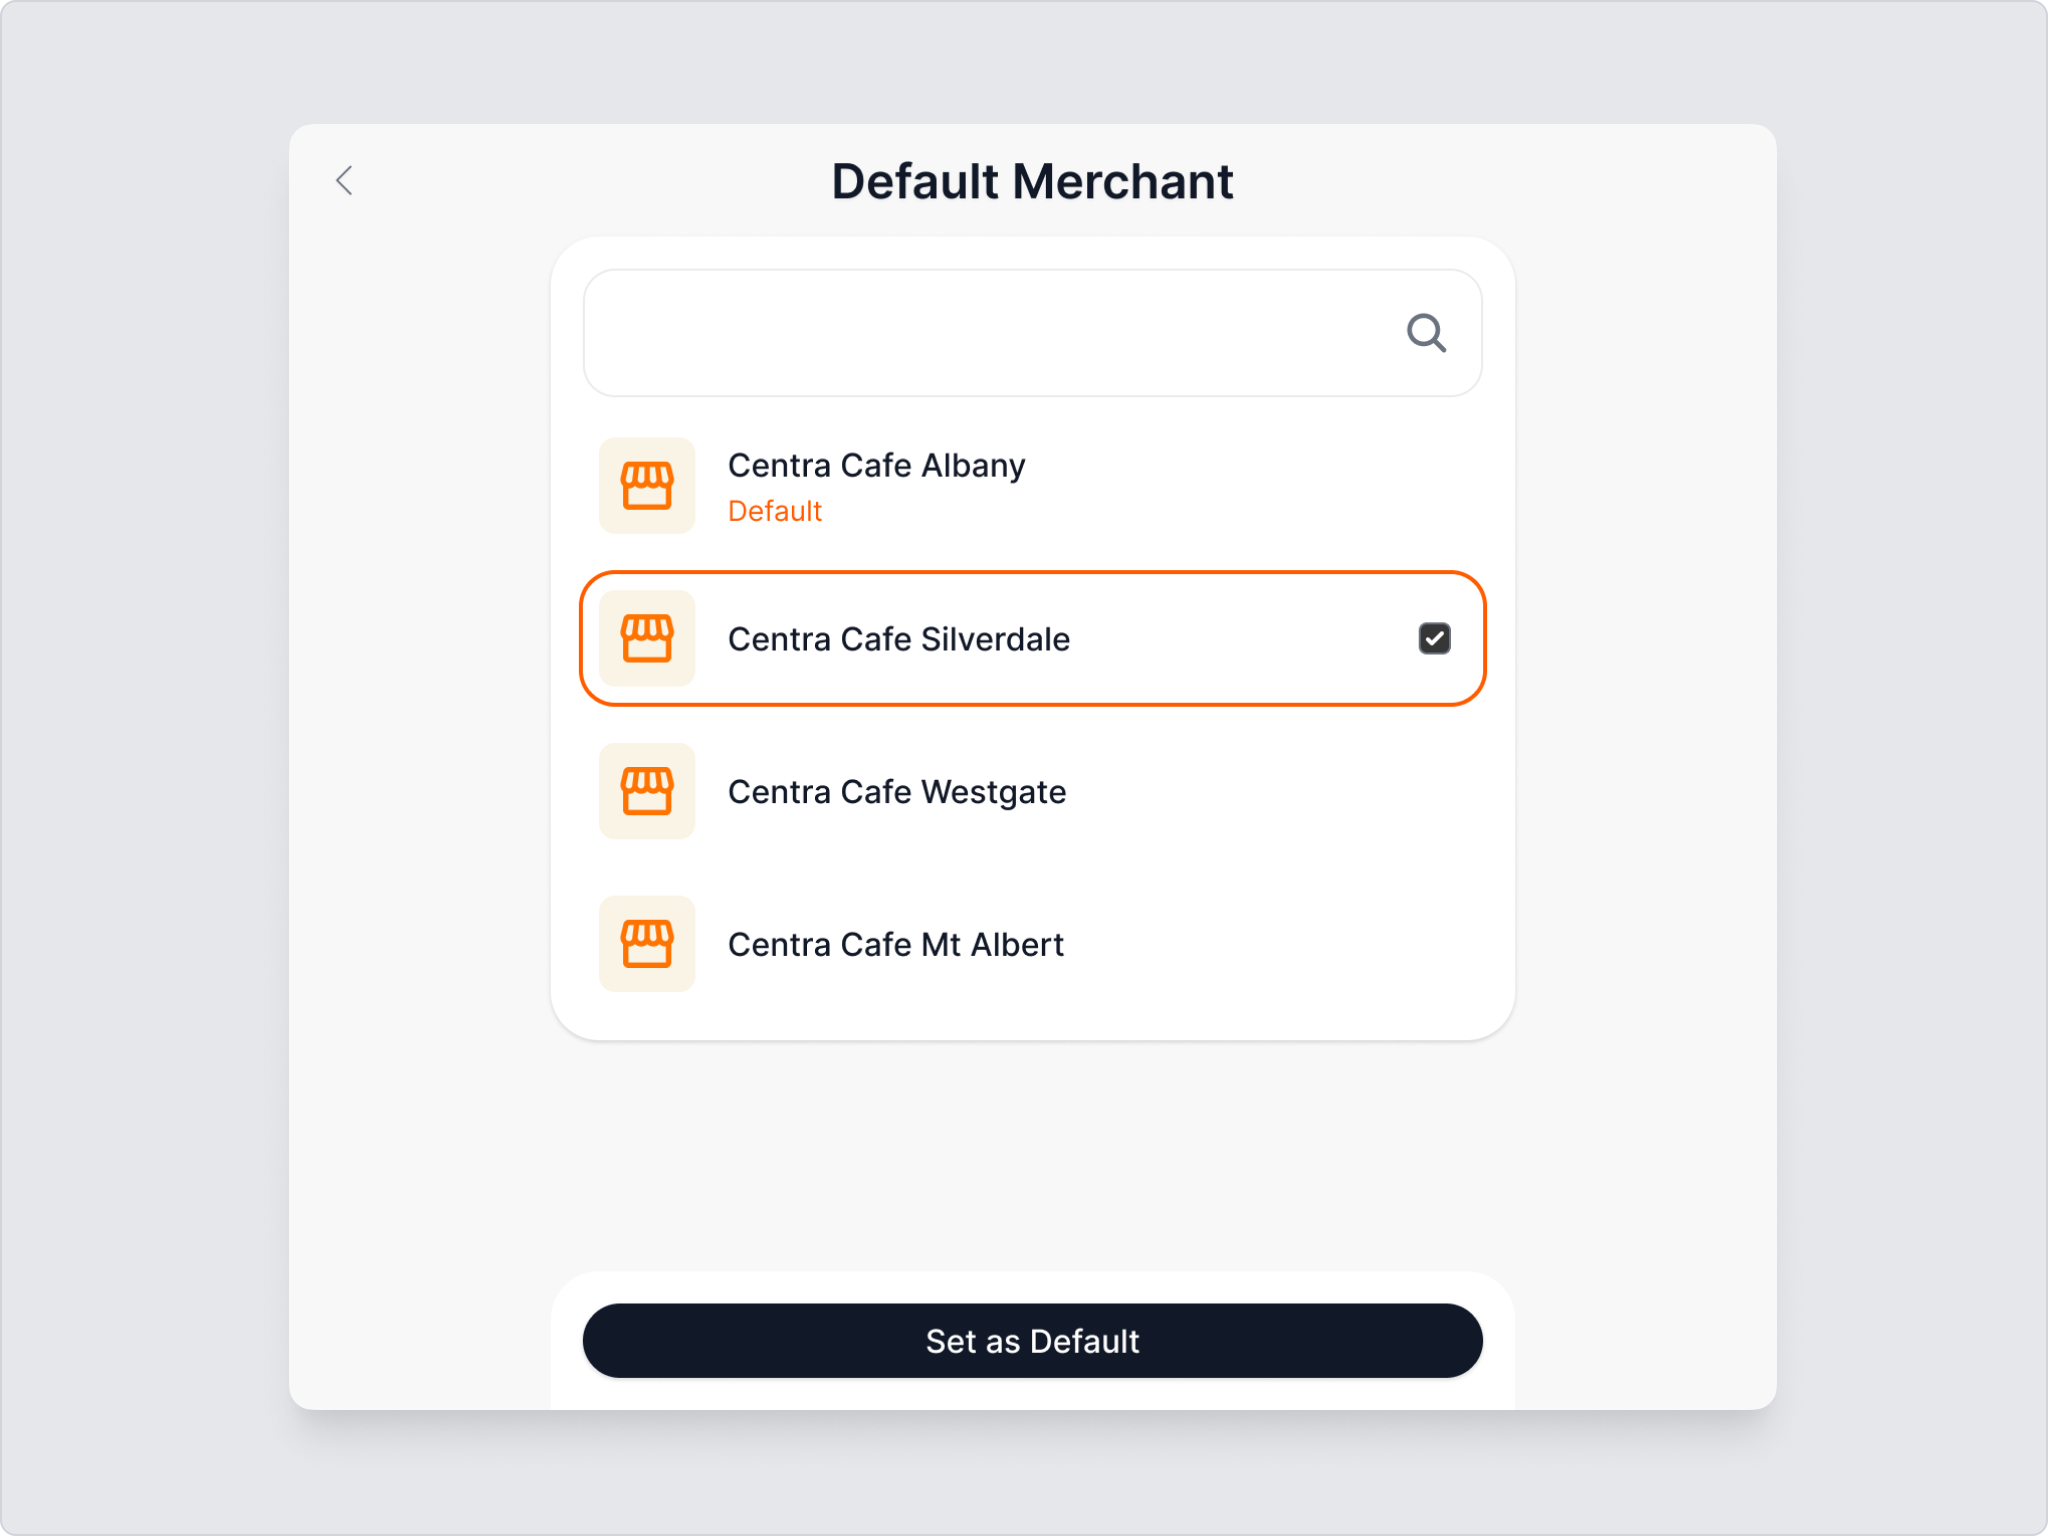
Set a Default Merchant Site
- When entering Nomad for the first time, you'll need to select a default merchant site. You can also switch between different merchant sites at any time from the top of the Nomad page.
Each member can set their own default site without affecting others.
Initiate a Transaction
Enter the amount and click Go to generate a payment QR code.
Users can scan the QR code with Payap or their phone camera to make a payment.
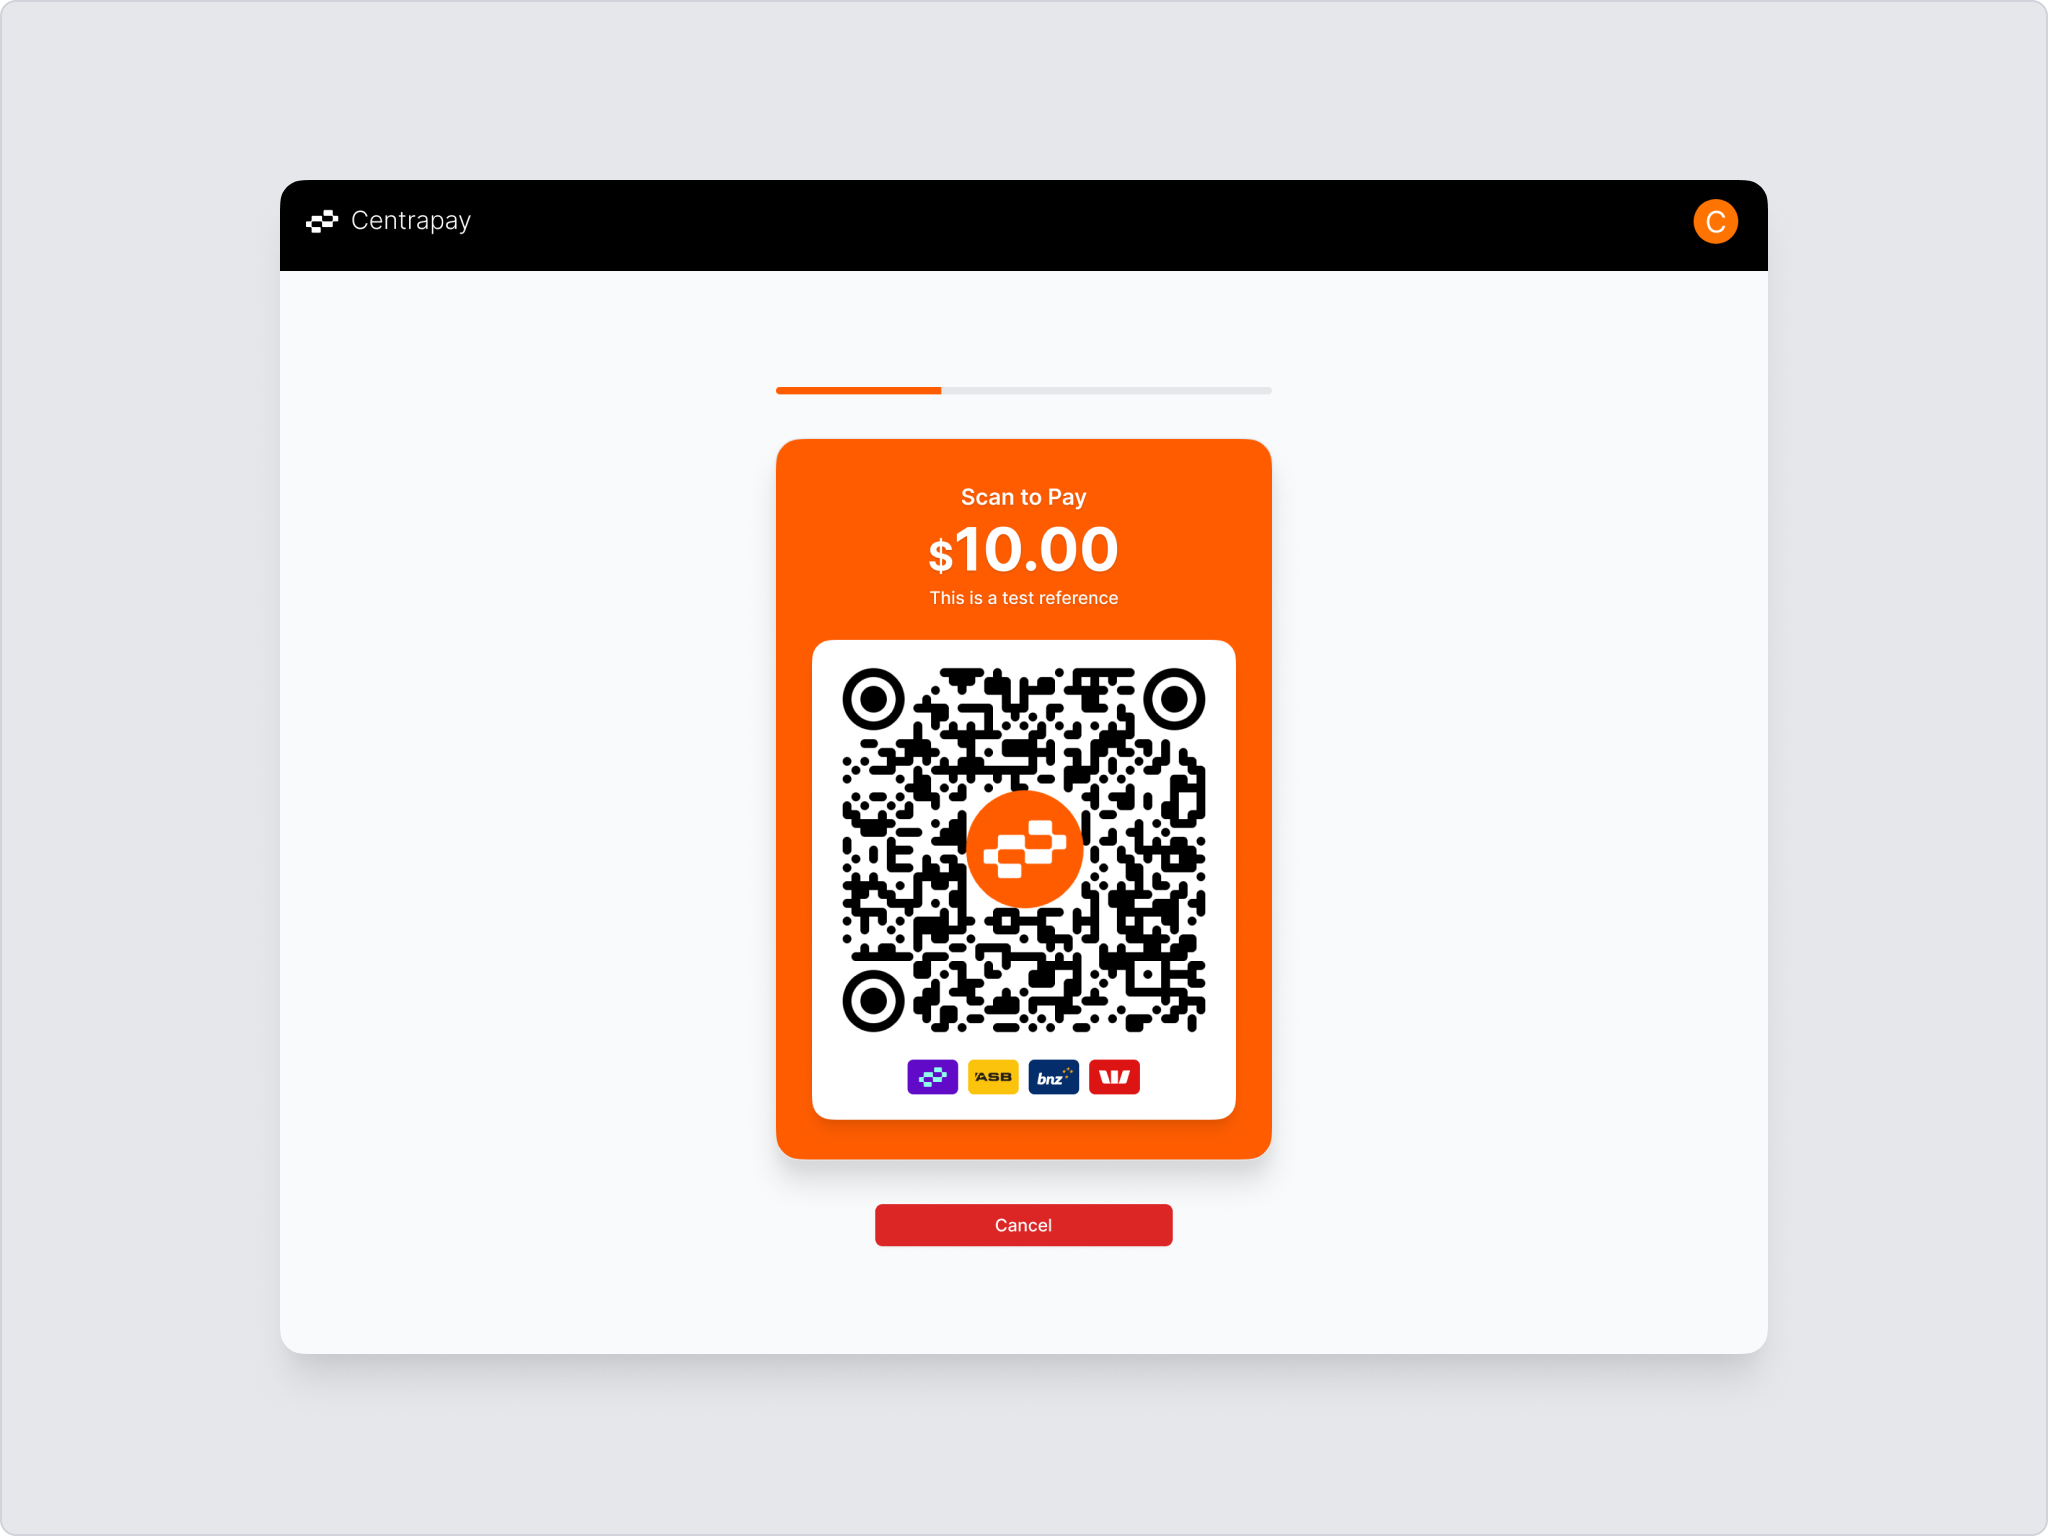
You will see a confirmation once the payment is successful. If the payment is not completed within the 2-minute countdown, a failure page will appear. You can still click Recreate Request to quickly resend the same payment request.
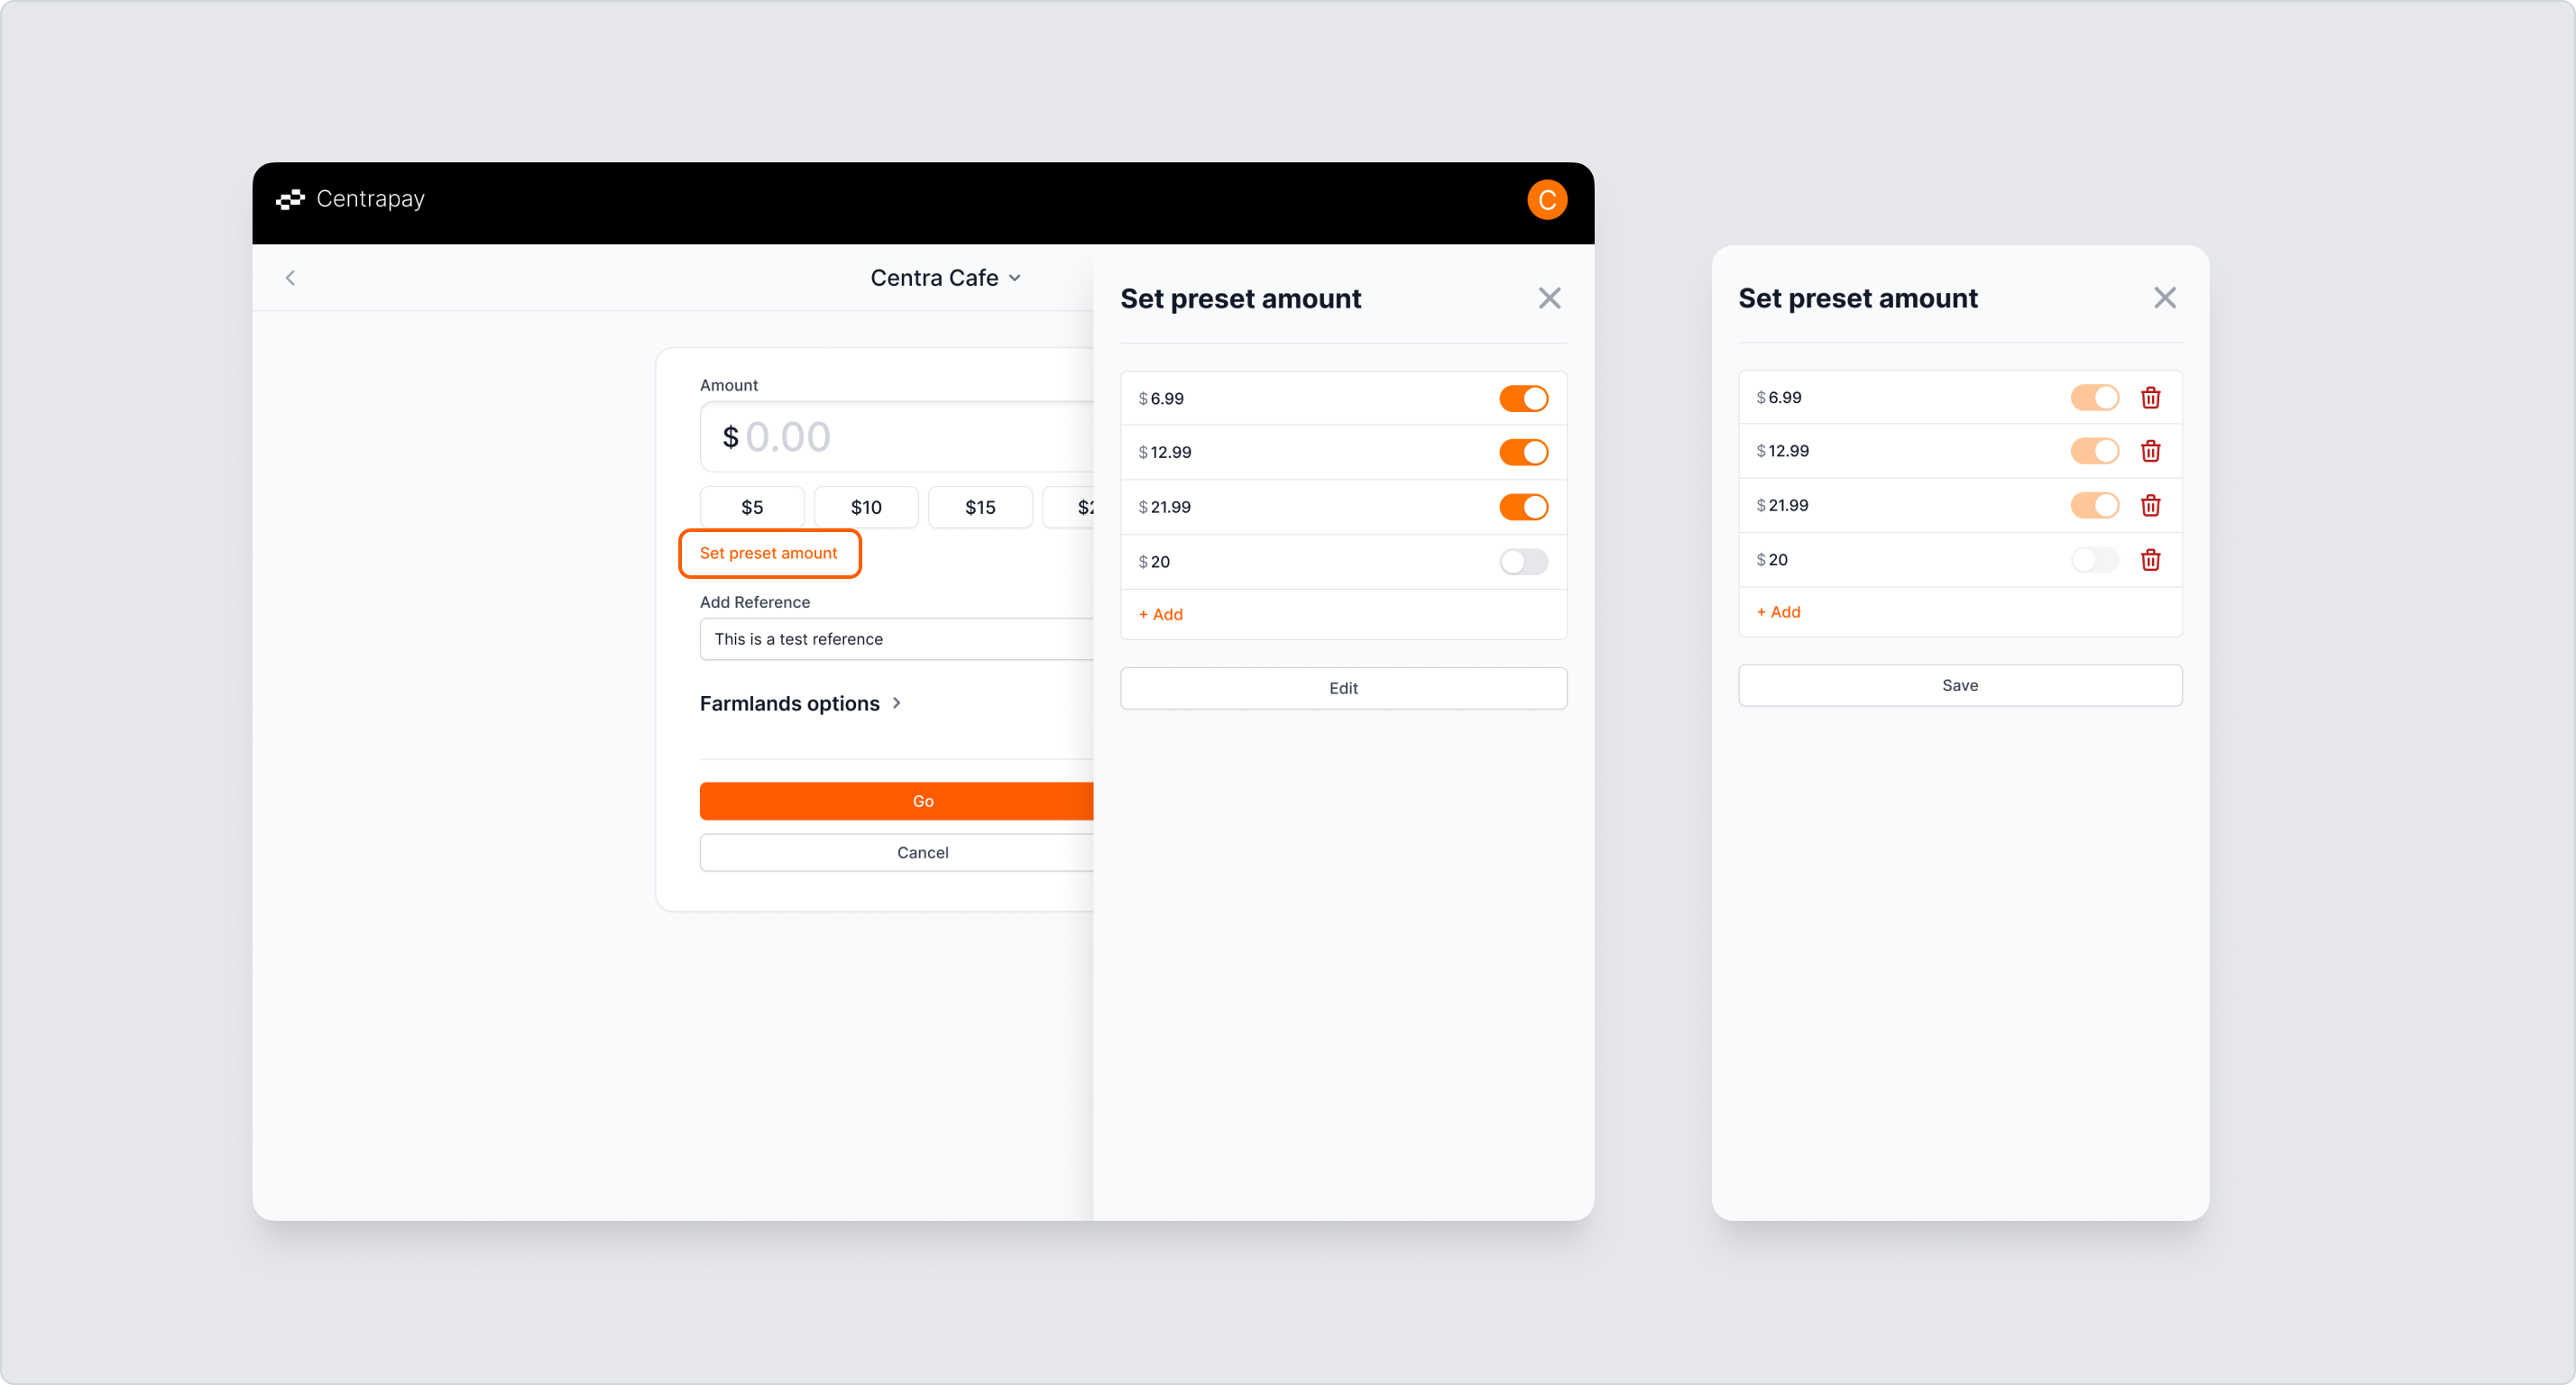
Preset Amounts
The numbers below the amount input field are preset amounts. Click them to quickly change the amount.
To manage preset amounts, click Set preset amount below the input field. On the slide-over panel, you can modify preset amounts or choose whether to display them. You can also click Edit to manage items, such as deleting those you don't need.